Finding Professors & Connecting with Them
Glossary:
- Professor: University faculty members (professors/supervisors/researchers)
- Profile: Your user account
Step 1
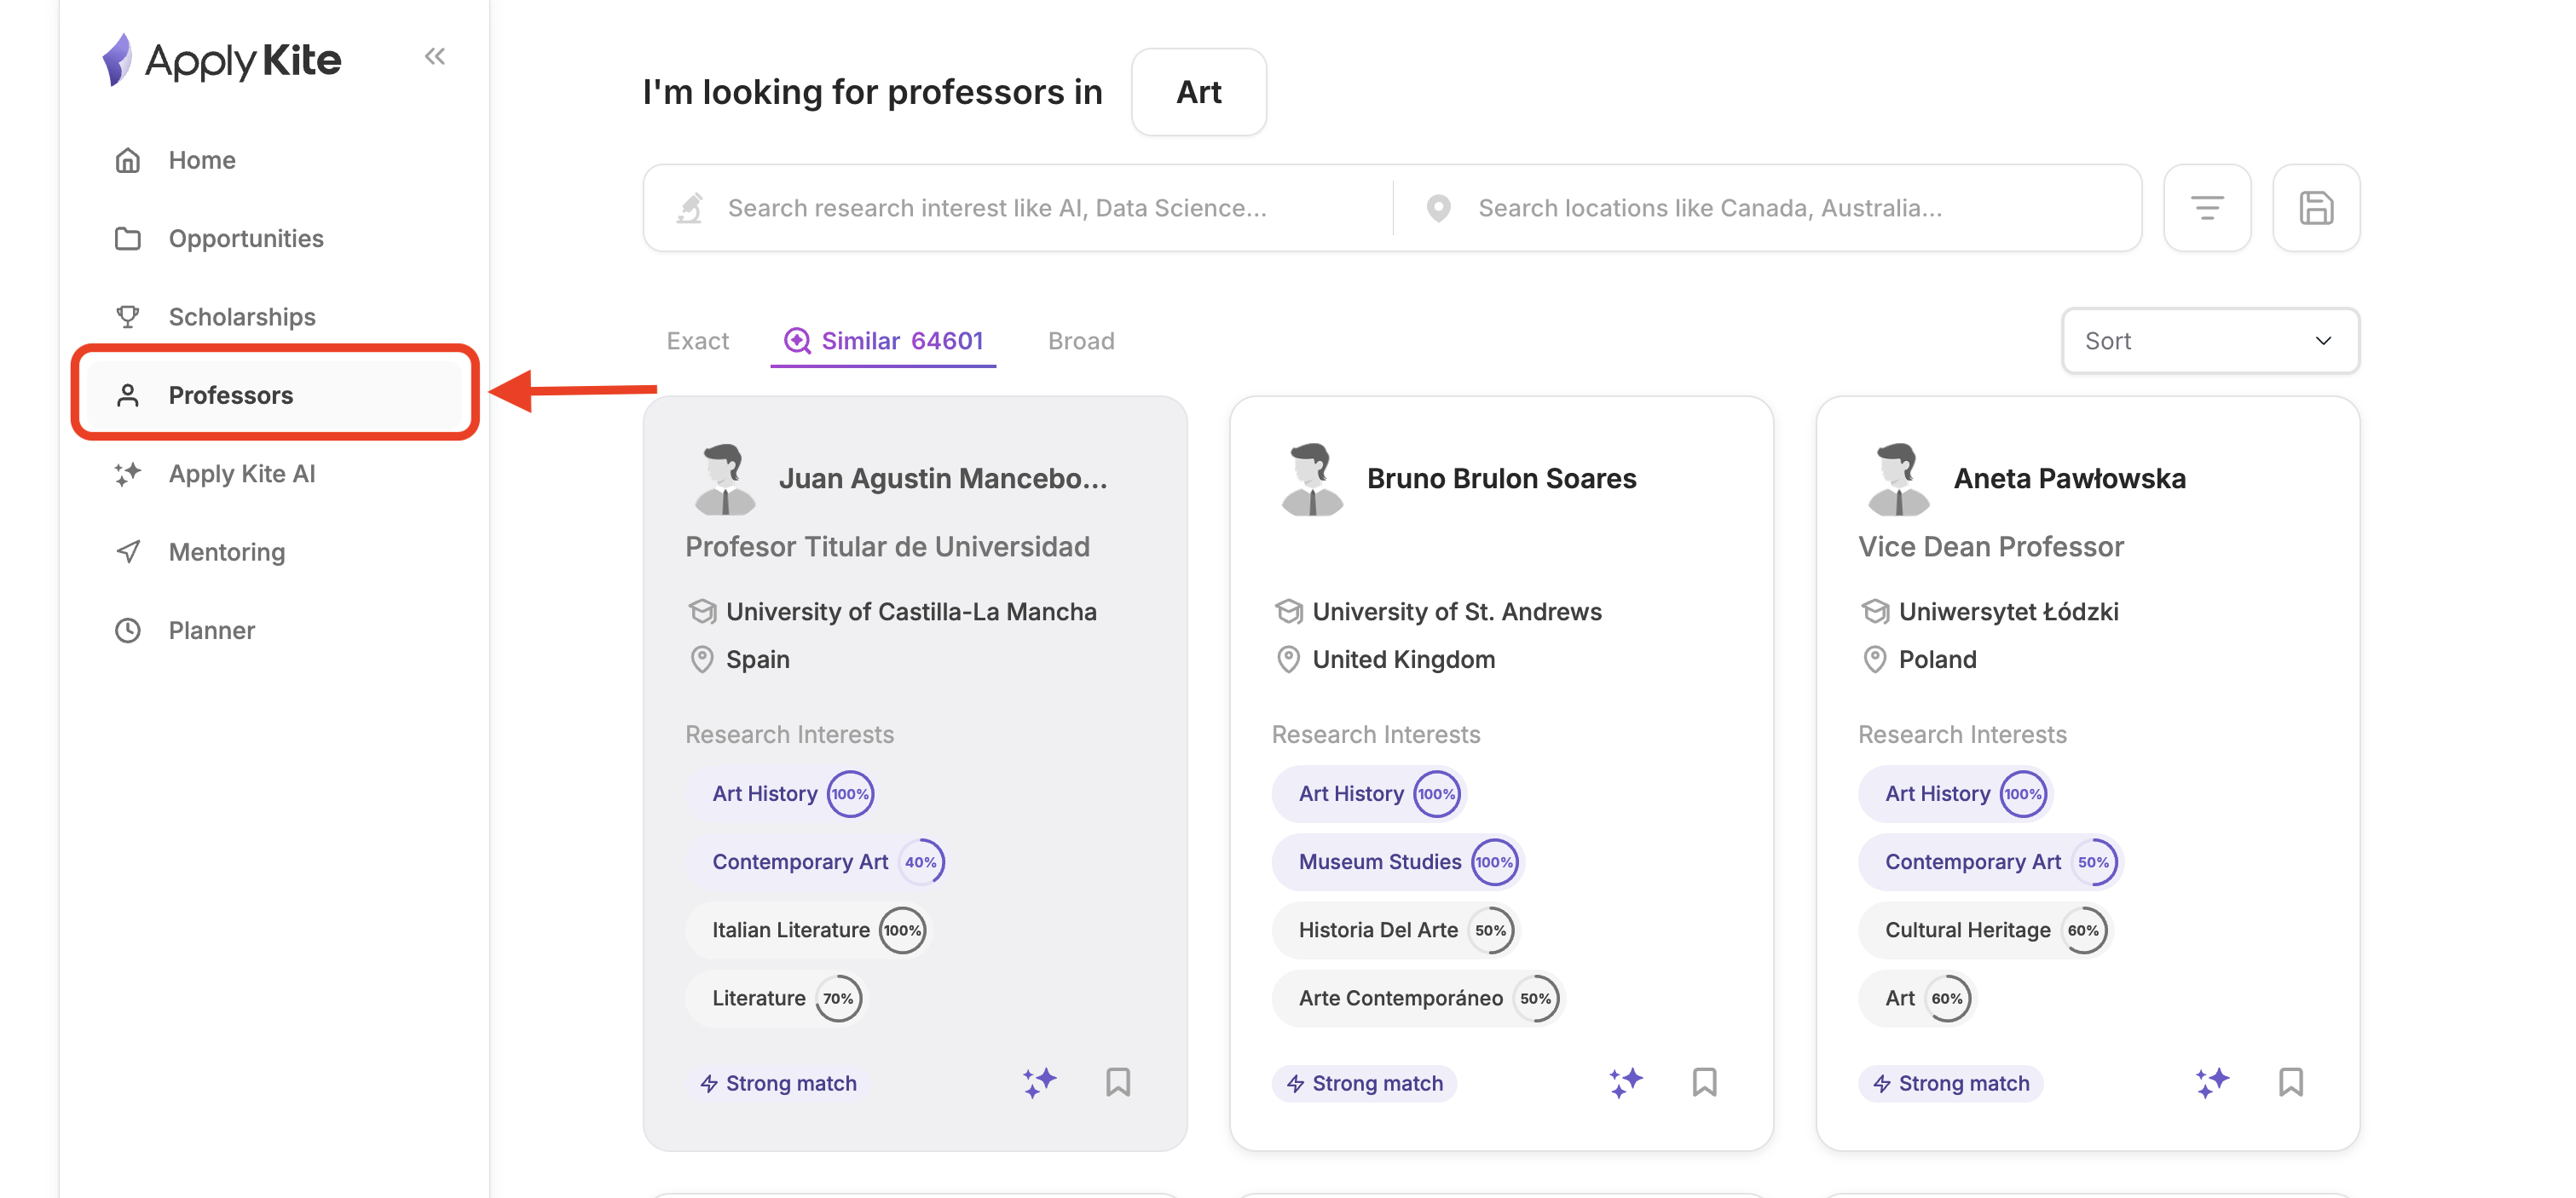
After you log into ApplyKite, go to Professors.
Step 2
First, choose your field.
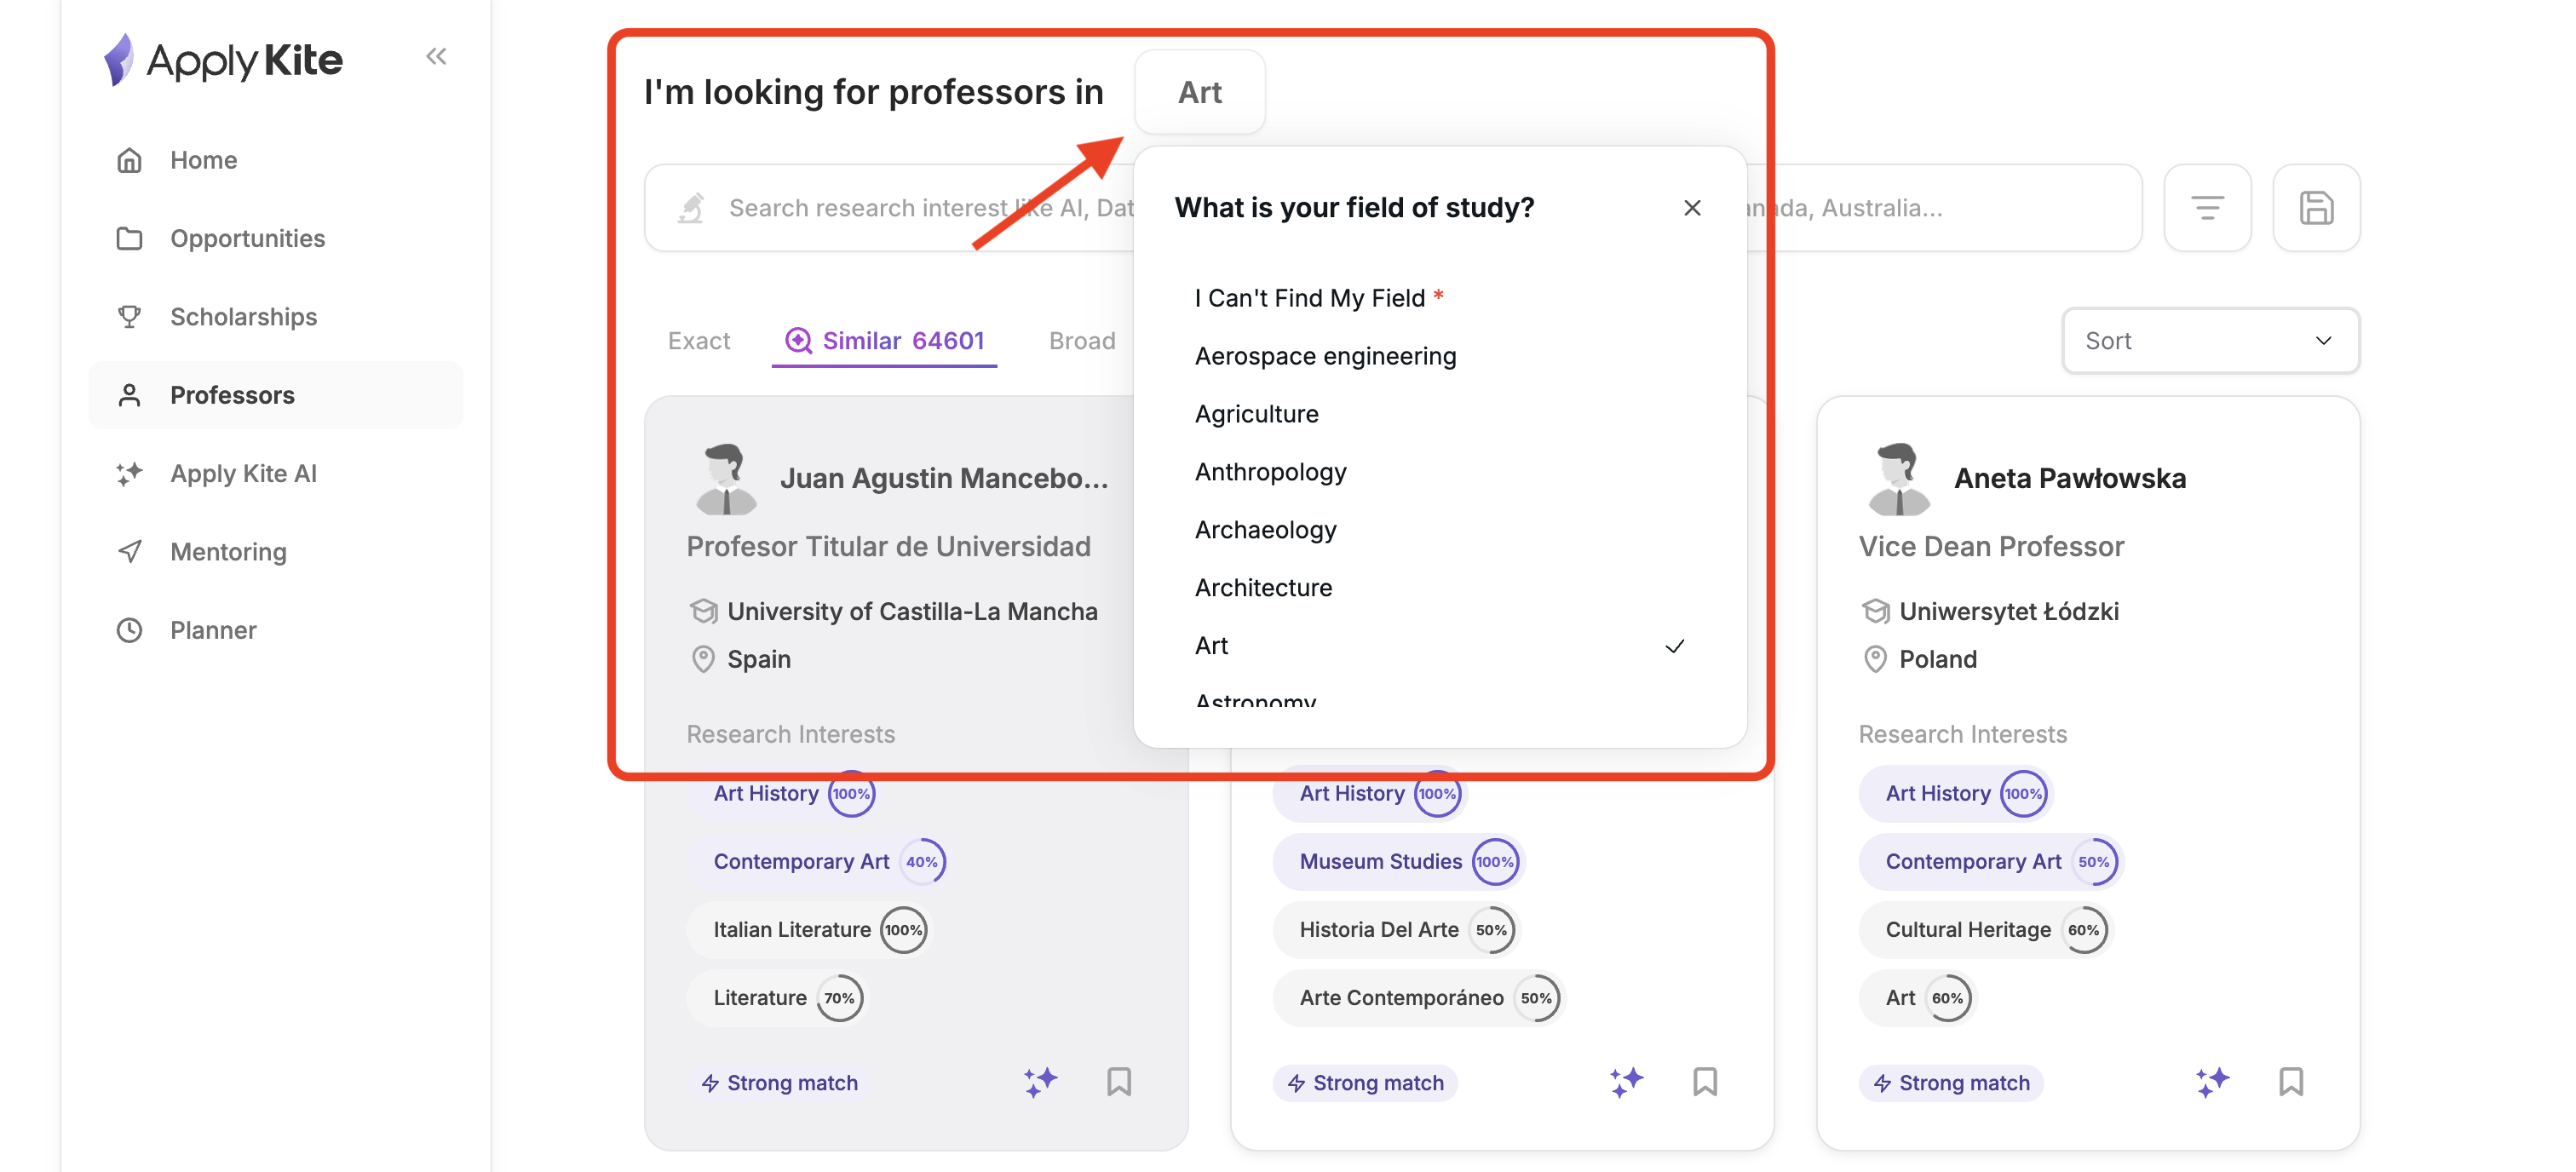
- When selecting your field, you’ll see a list of general field names. If you can’t find your exact field, choose I Can't Find My Field.
- Note: If your field is close to an existing option, you can select the closest match.
- You can always change your field later—just update it from the relevant section.
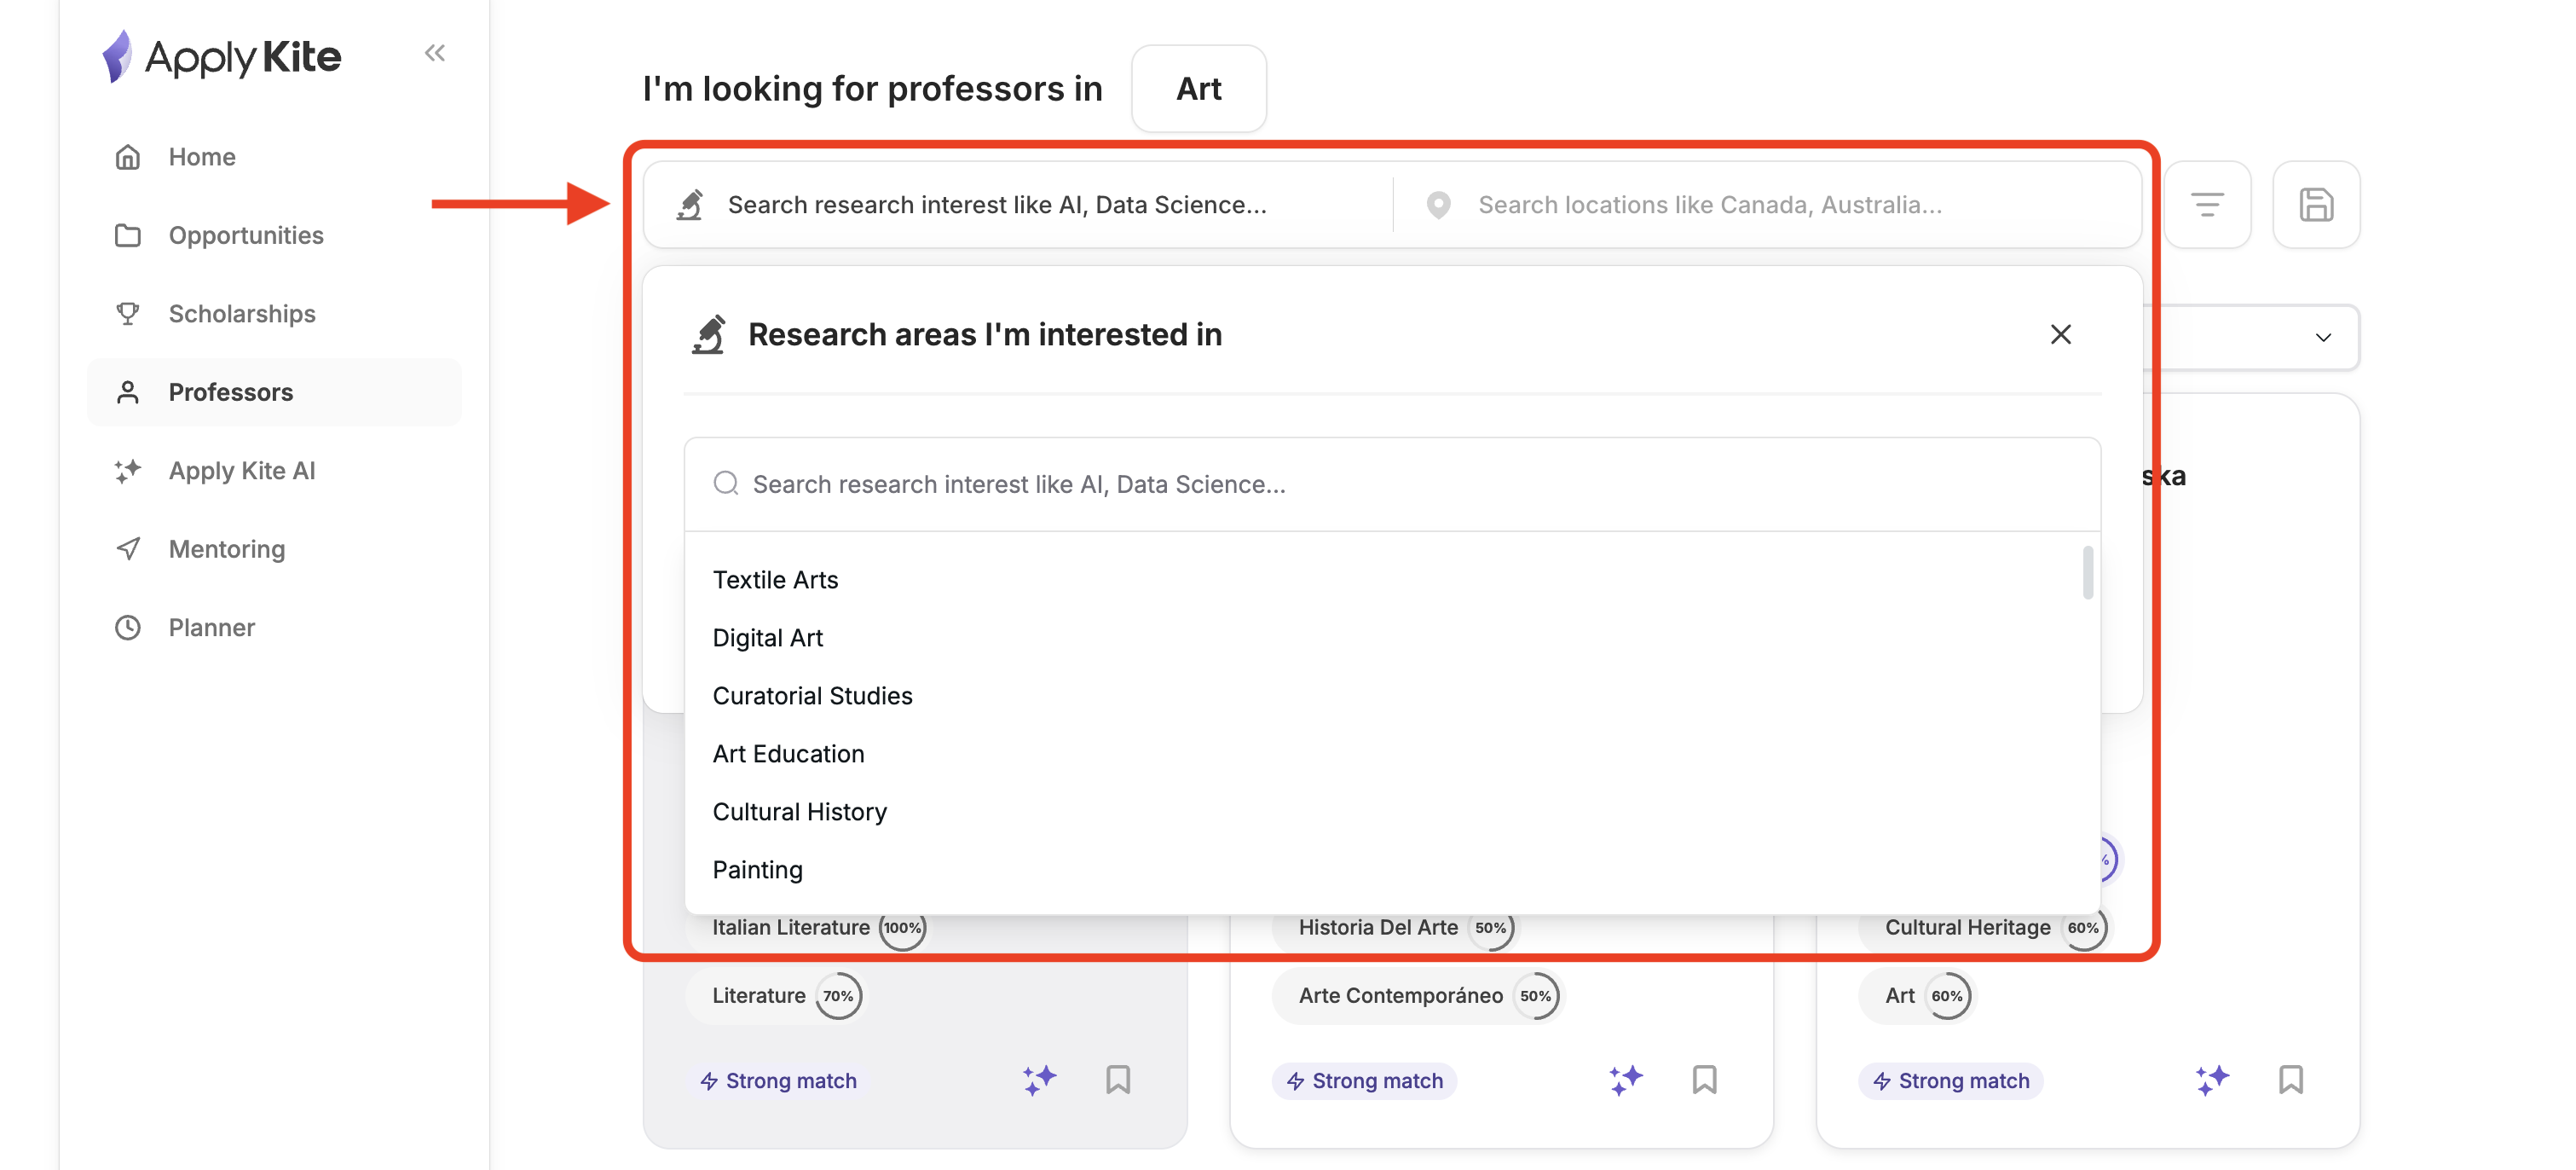
Searching for Professors
- Start by entering keywords to find professors related to your academic/research interests.
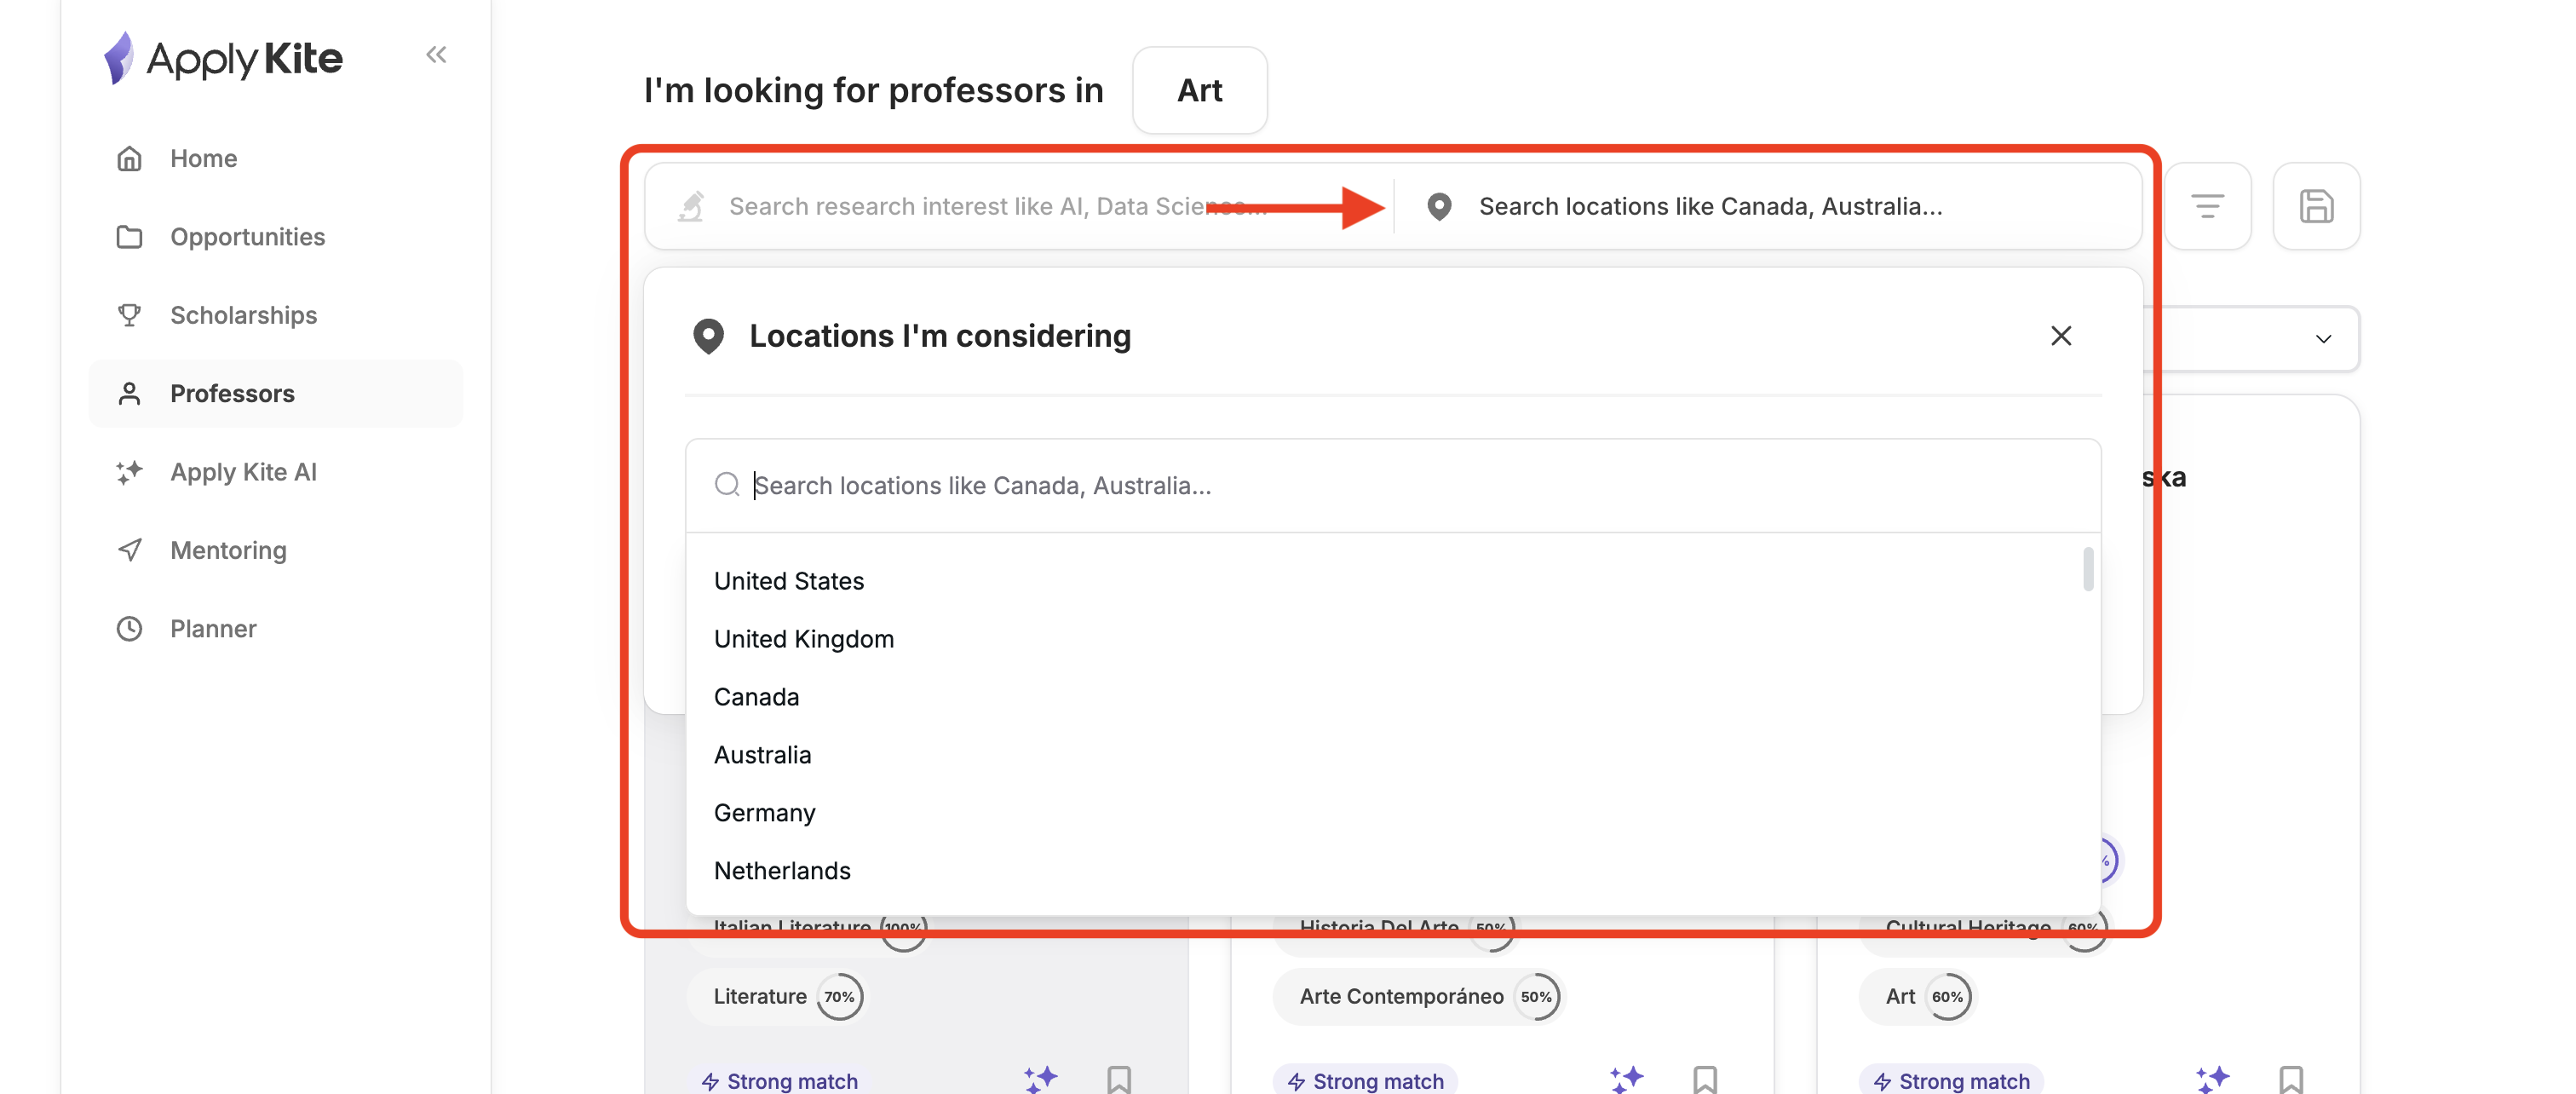
- You can also select your target country from here.
Important notes:
-
Many professors work across multiple areas, so when you enter keywords, you may see professors from different fields. This is normal and happens because research areas often overlap. Also, field names and program titles worldwide can be different from what many students are familiar with—so choosing the right keywords matters.
-
To find professors in a specific area, enter a list of keywords related to your field. The more relevant keywords you add, the more accurate your results will be.
-
If you use only one keyword, you may also see professors whose work overlaps with your field. What does that mean?
-
For example, if your profile field is Computer Science, and you only enter “Computer Science” as a keyword, you might also see professors in medicine, electrical engineering, and other areas. This does not mean the results are wrong.
-
Many research areas are interdisciplinary. For example, a medical research group may still need strong Computer Science expertise.
-
To find professors that match your interests more closely, simply enter a richer list of relevant keywords.
For example:
- Classification Algorithms
- Algorithm Design
- Computer Science
- Python Programming
After you enter your keywords, ApplyKite will ask how strict you want the matching to be.
For example:
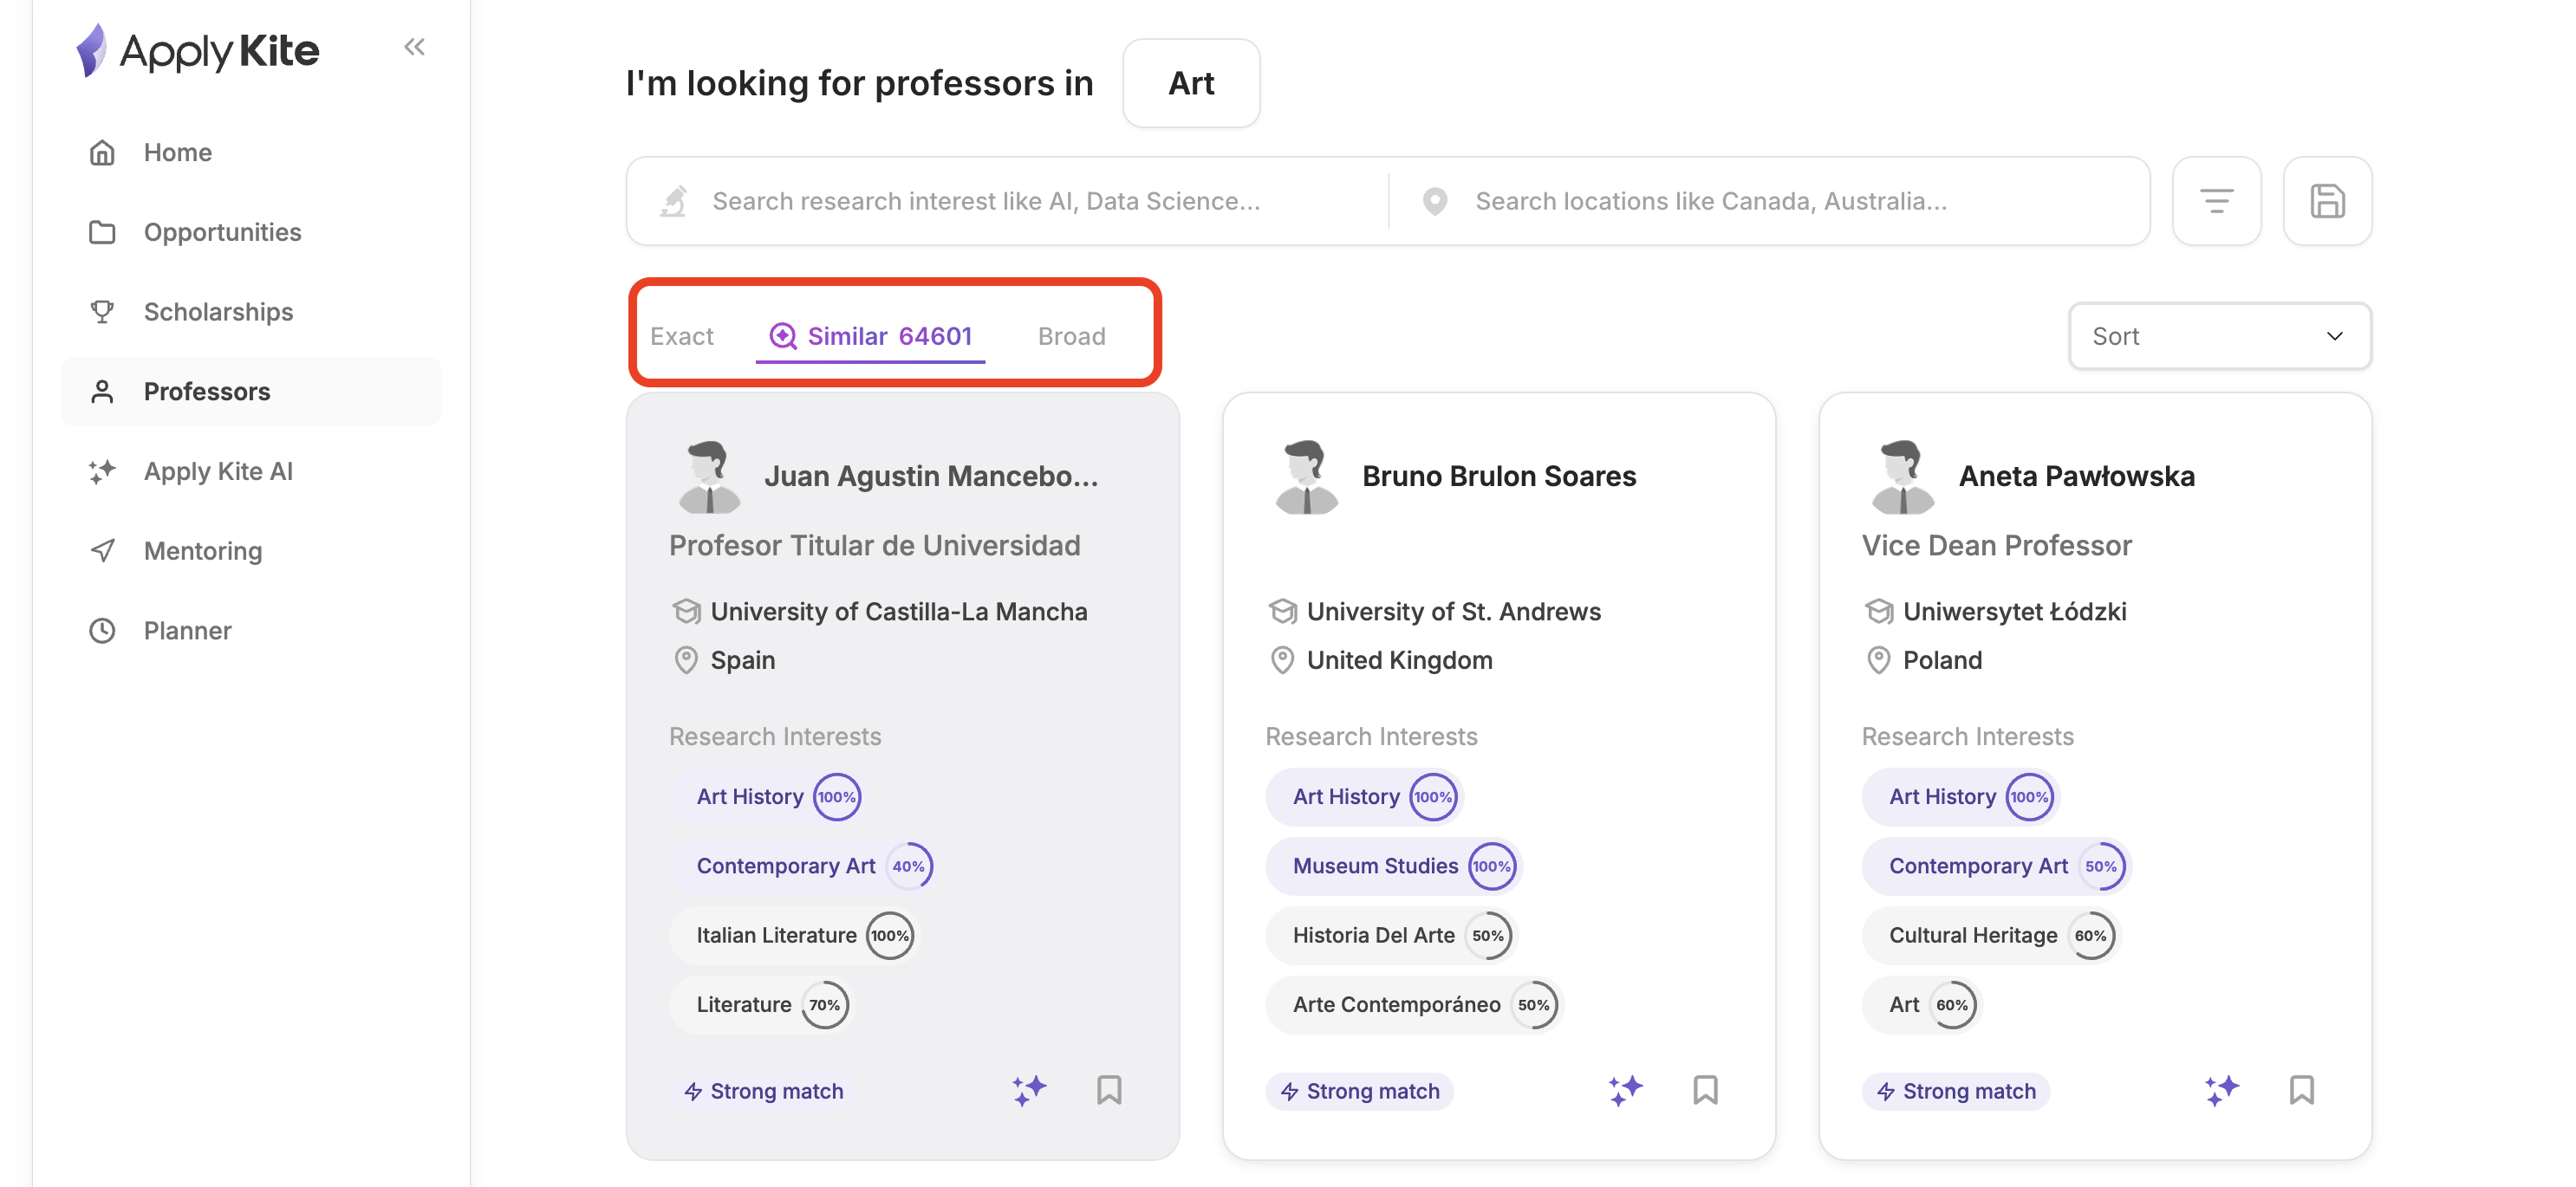
- Exact: Use this if you want results strictly limited to your keywords and directly related areas.
- Similar: Use this if you want a balanced set of results.
- Broad: Use this if you want to explore a wider range of results.
Example:
- You didn’t include “Algorithm Analysis” in your keyword list, but if you choose Similar or Broad, you may still see professors related to Algorithm Analysis.
Other Filters
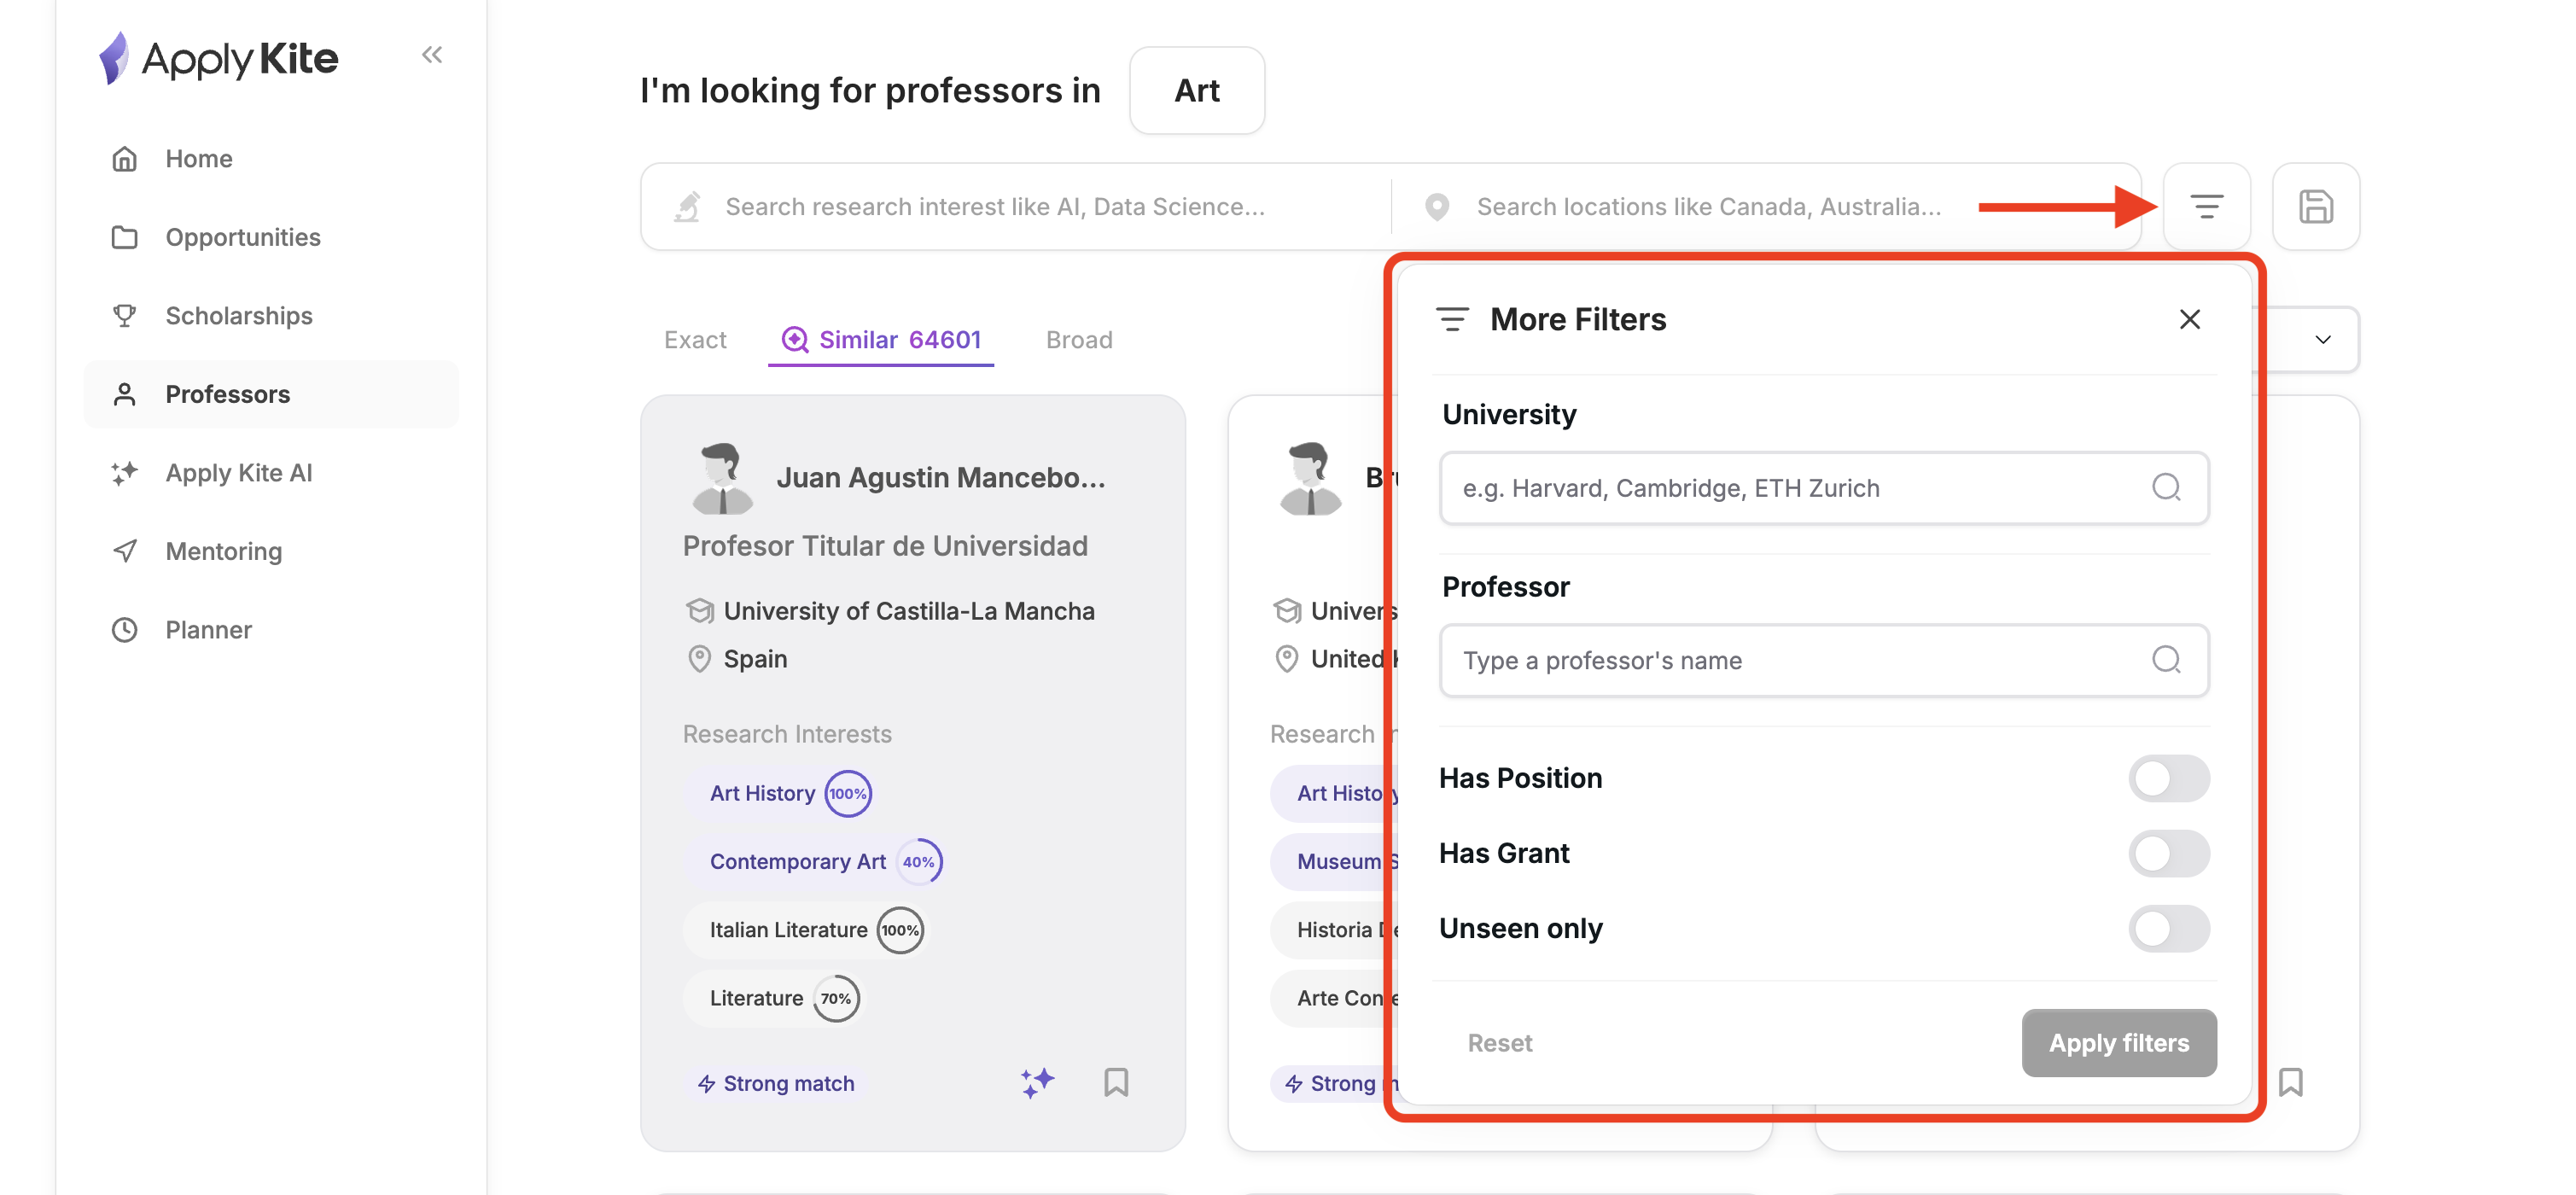
After entering keywords, you can filter the professor list by:
- Country: Filter professors in a specific country (e.g., the UK)
- University: Filter professors in a specific university (e.g., Jagiellonian University)
- Professor name: Search for a professor by name
- Funding: Filter by whether the professor offers funding
- Active positions: Filter by whether the professor currently has active opportunities
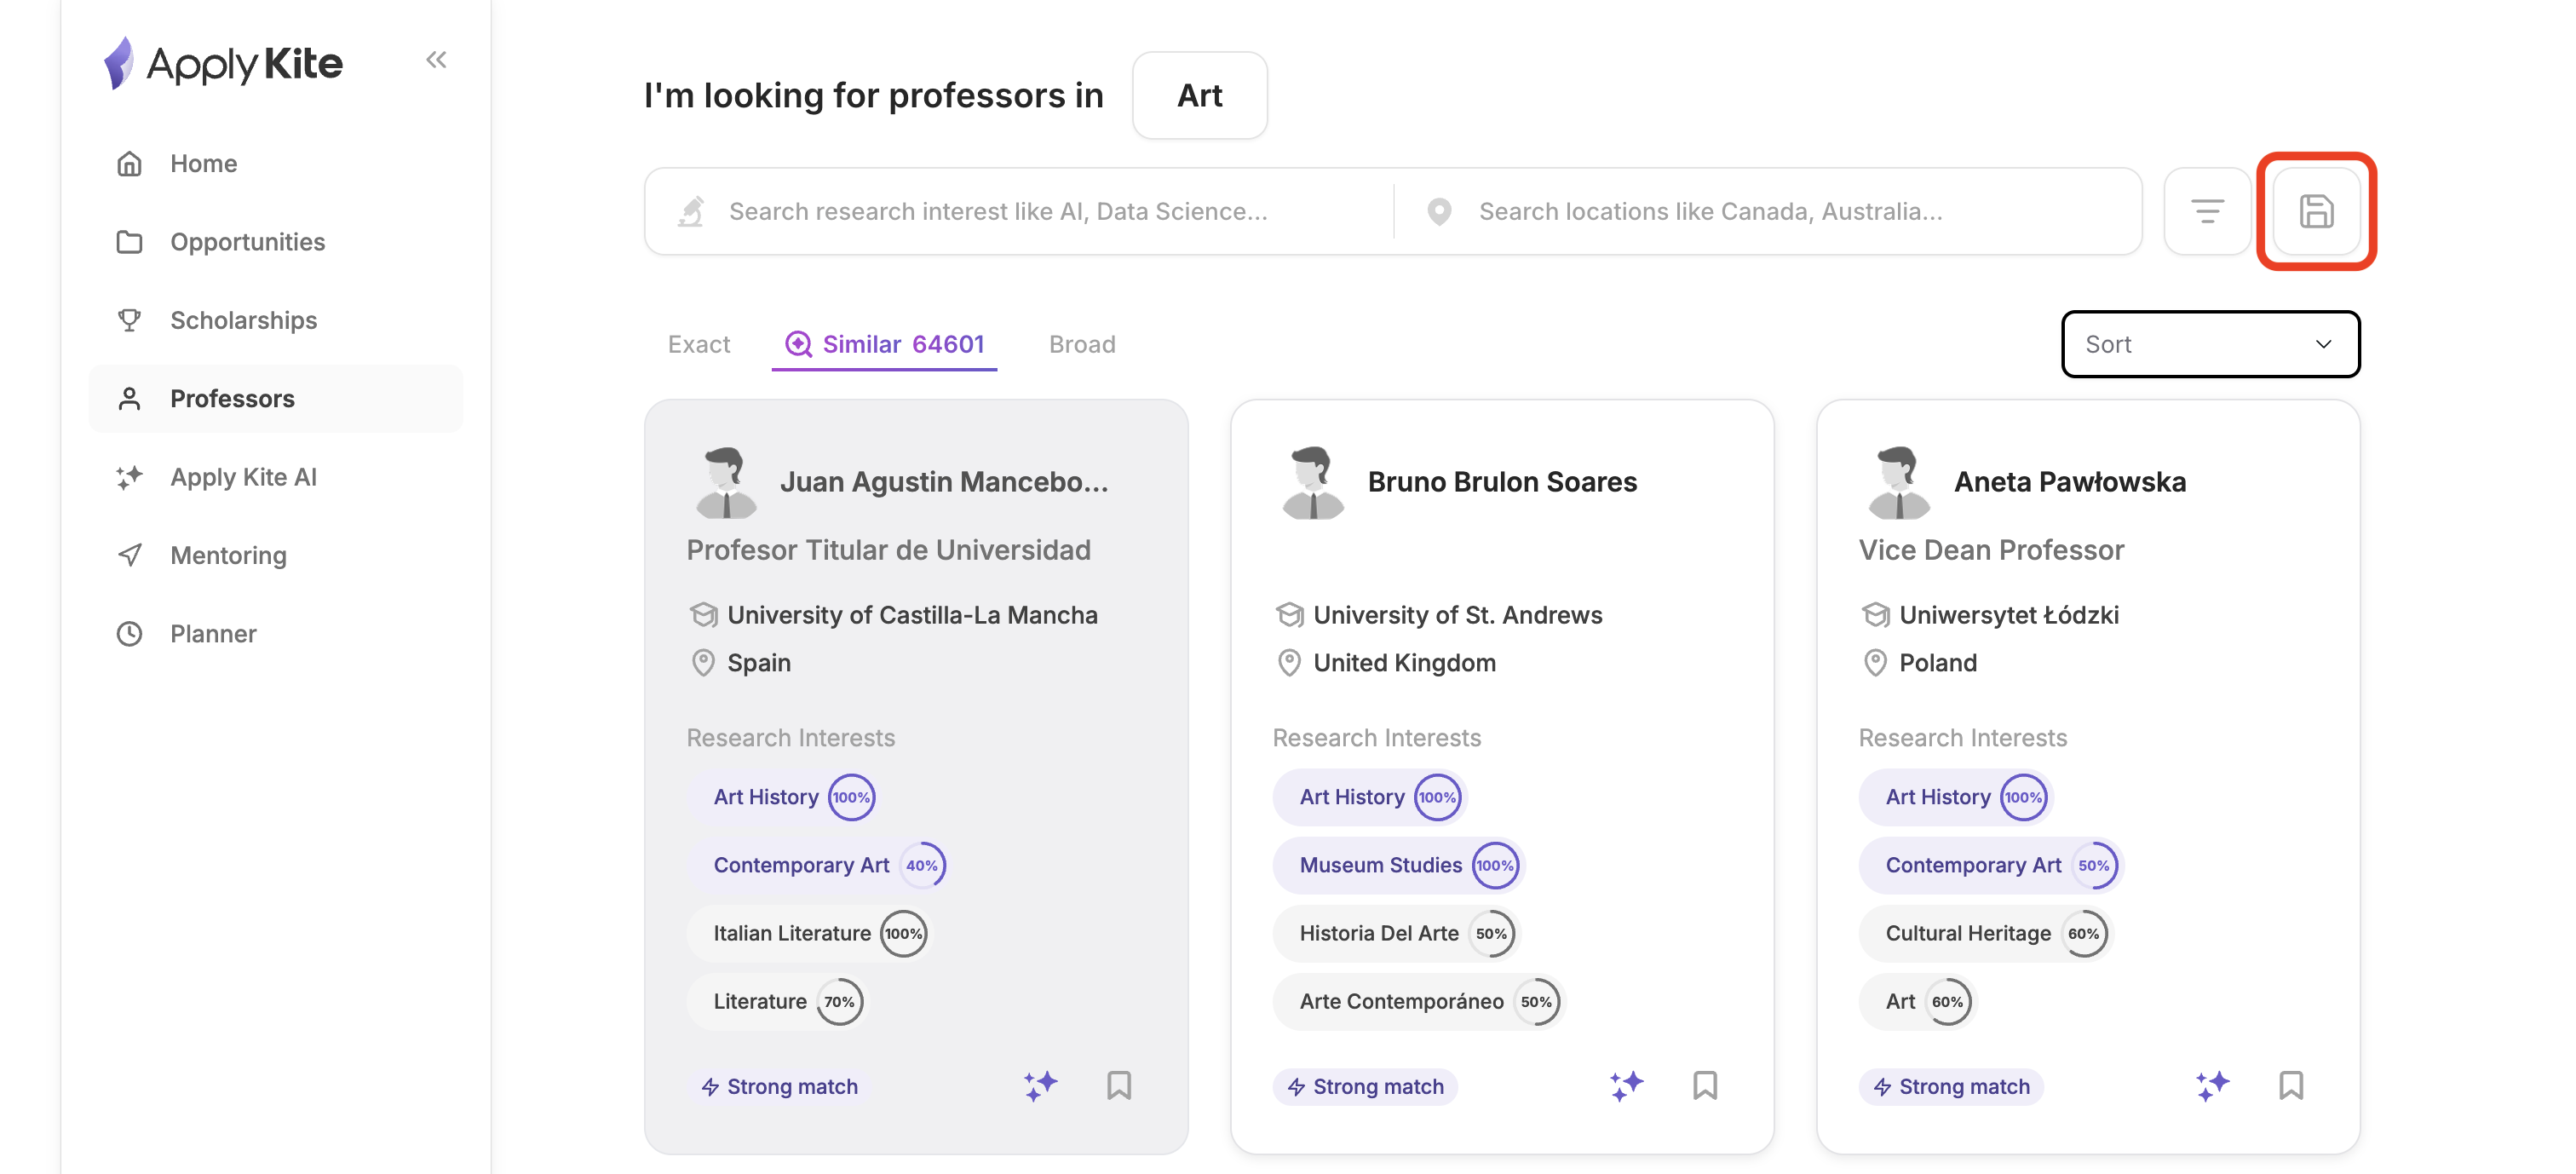
Saving Filters
To make your workflow easier, you can apply your filters once and then save them. This way, you don’t need to set everything again—just click Load filter and your saved filters will be applied.
How to Connect With Professors
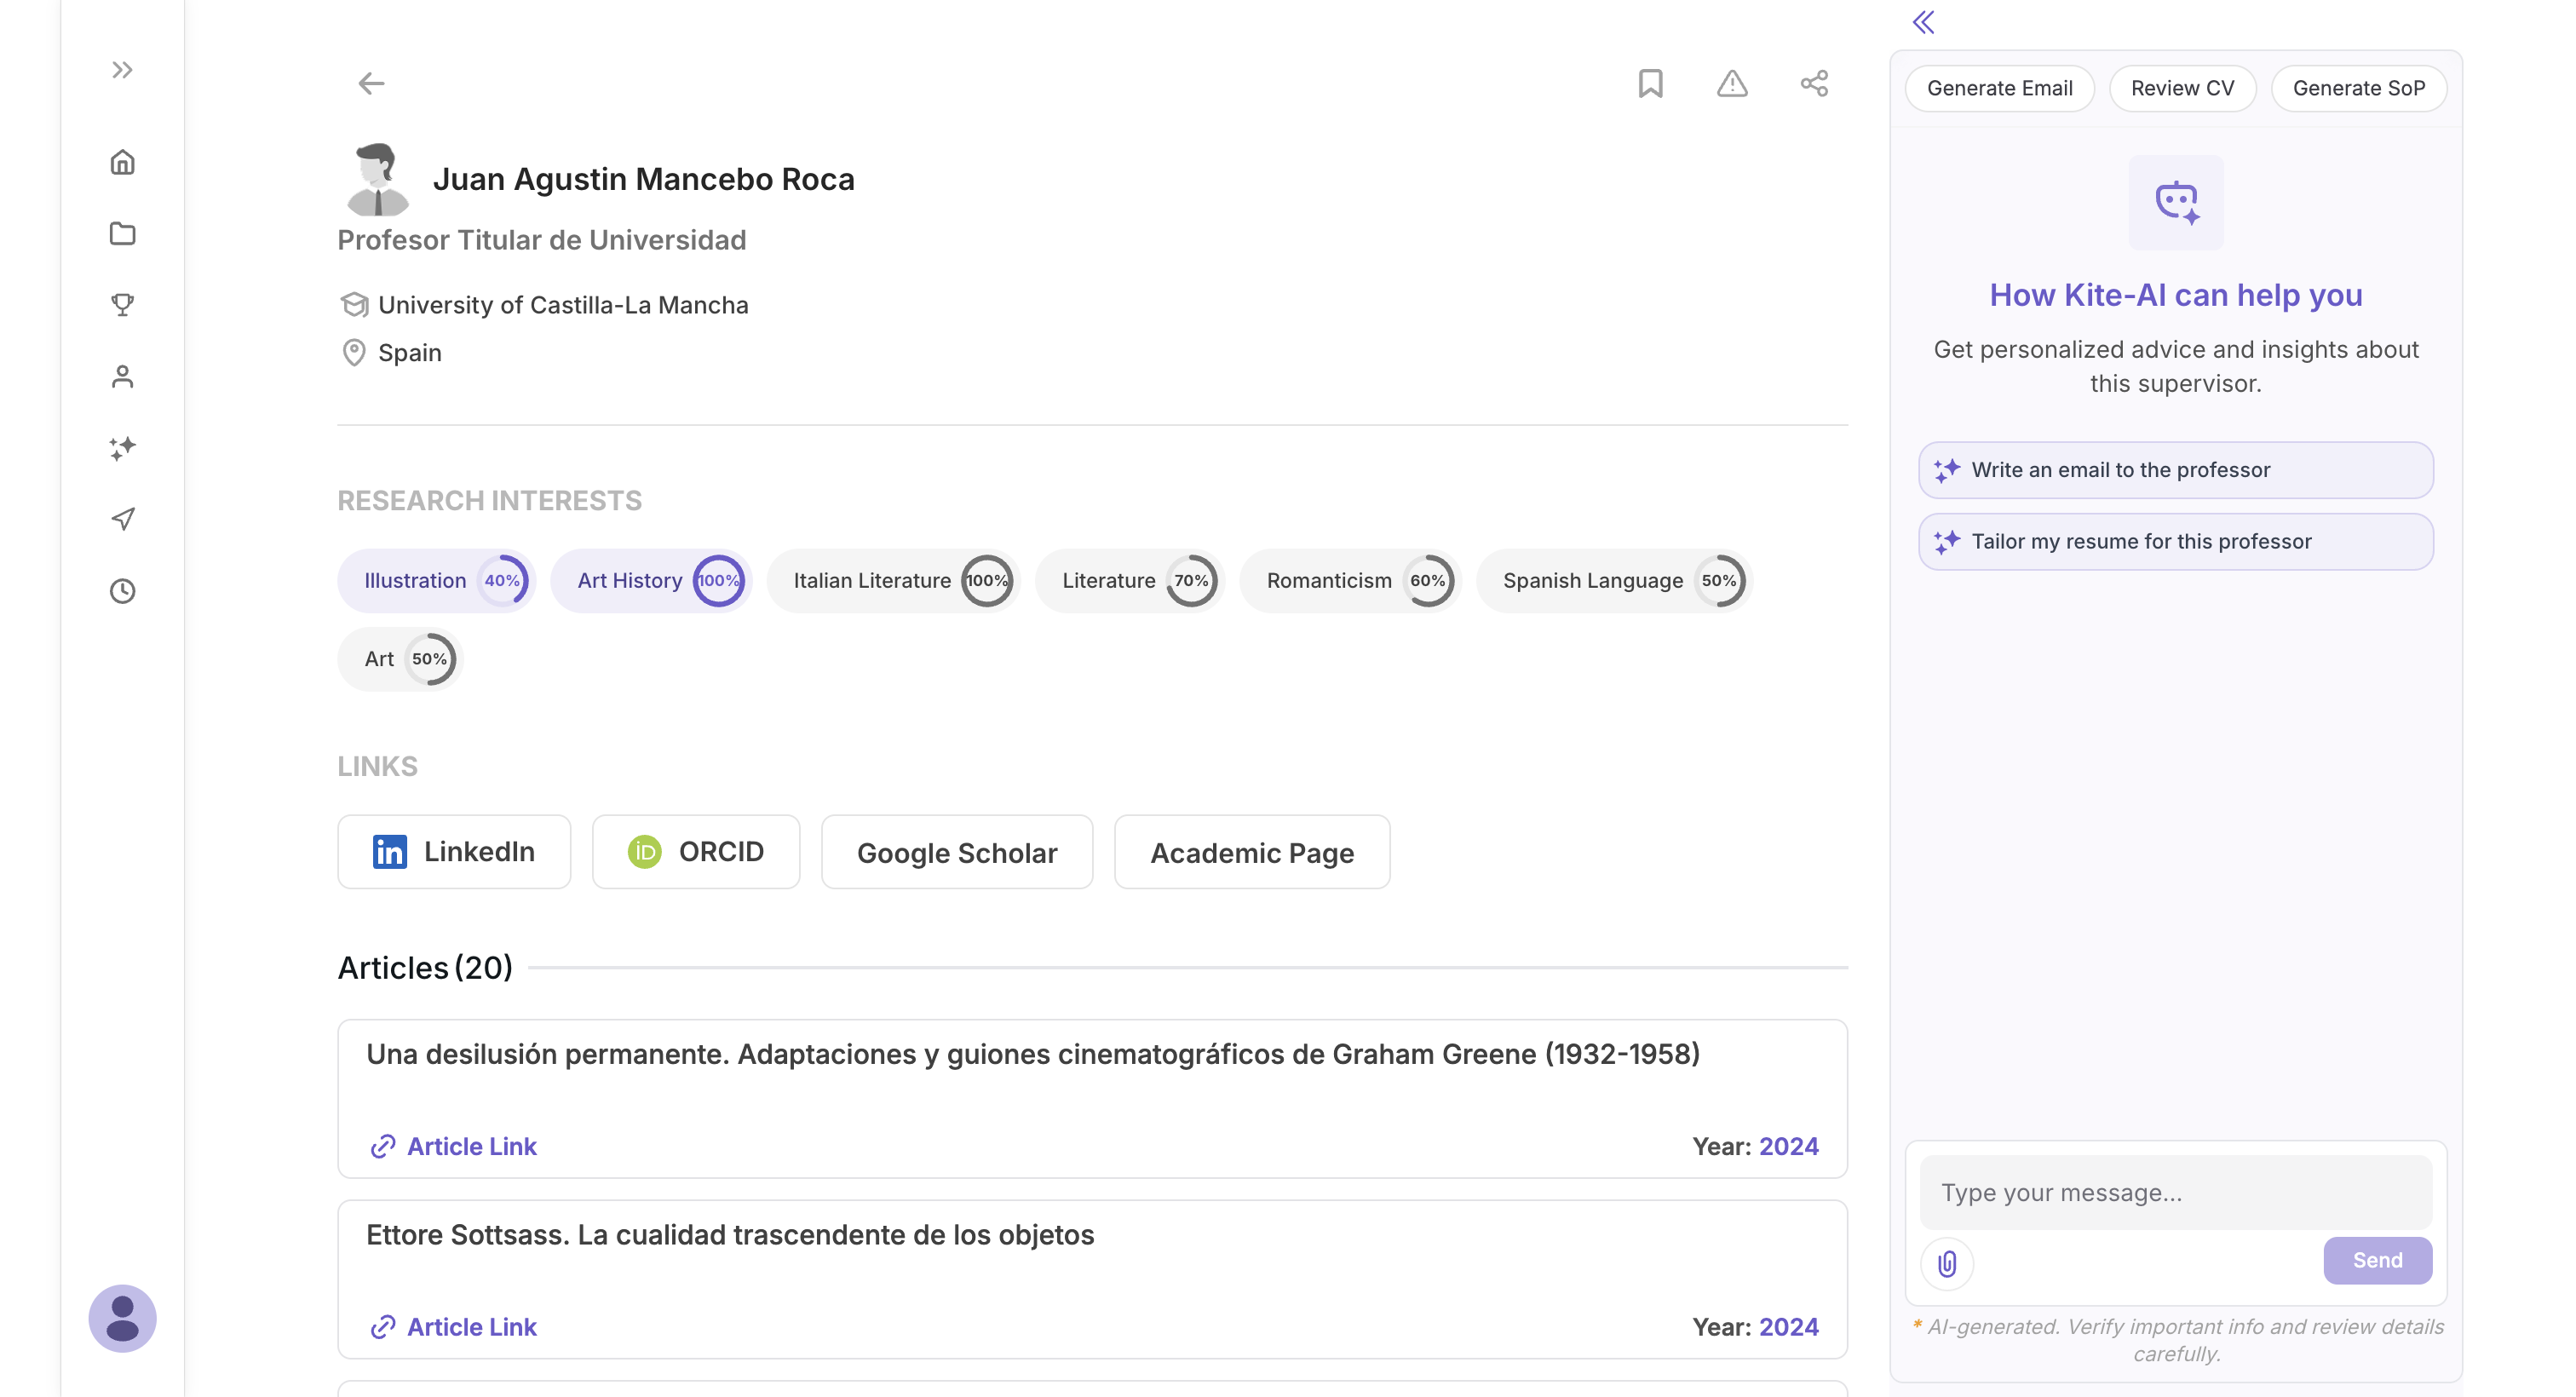
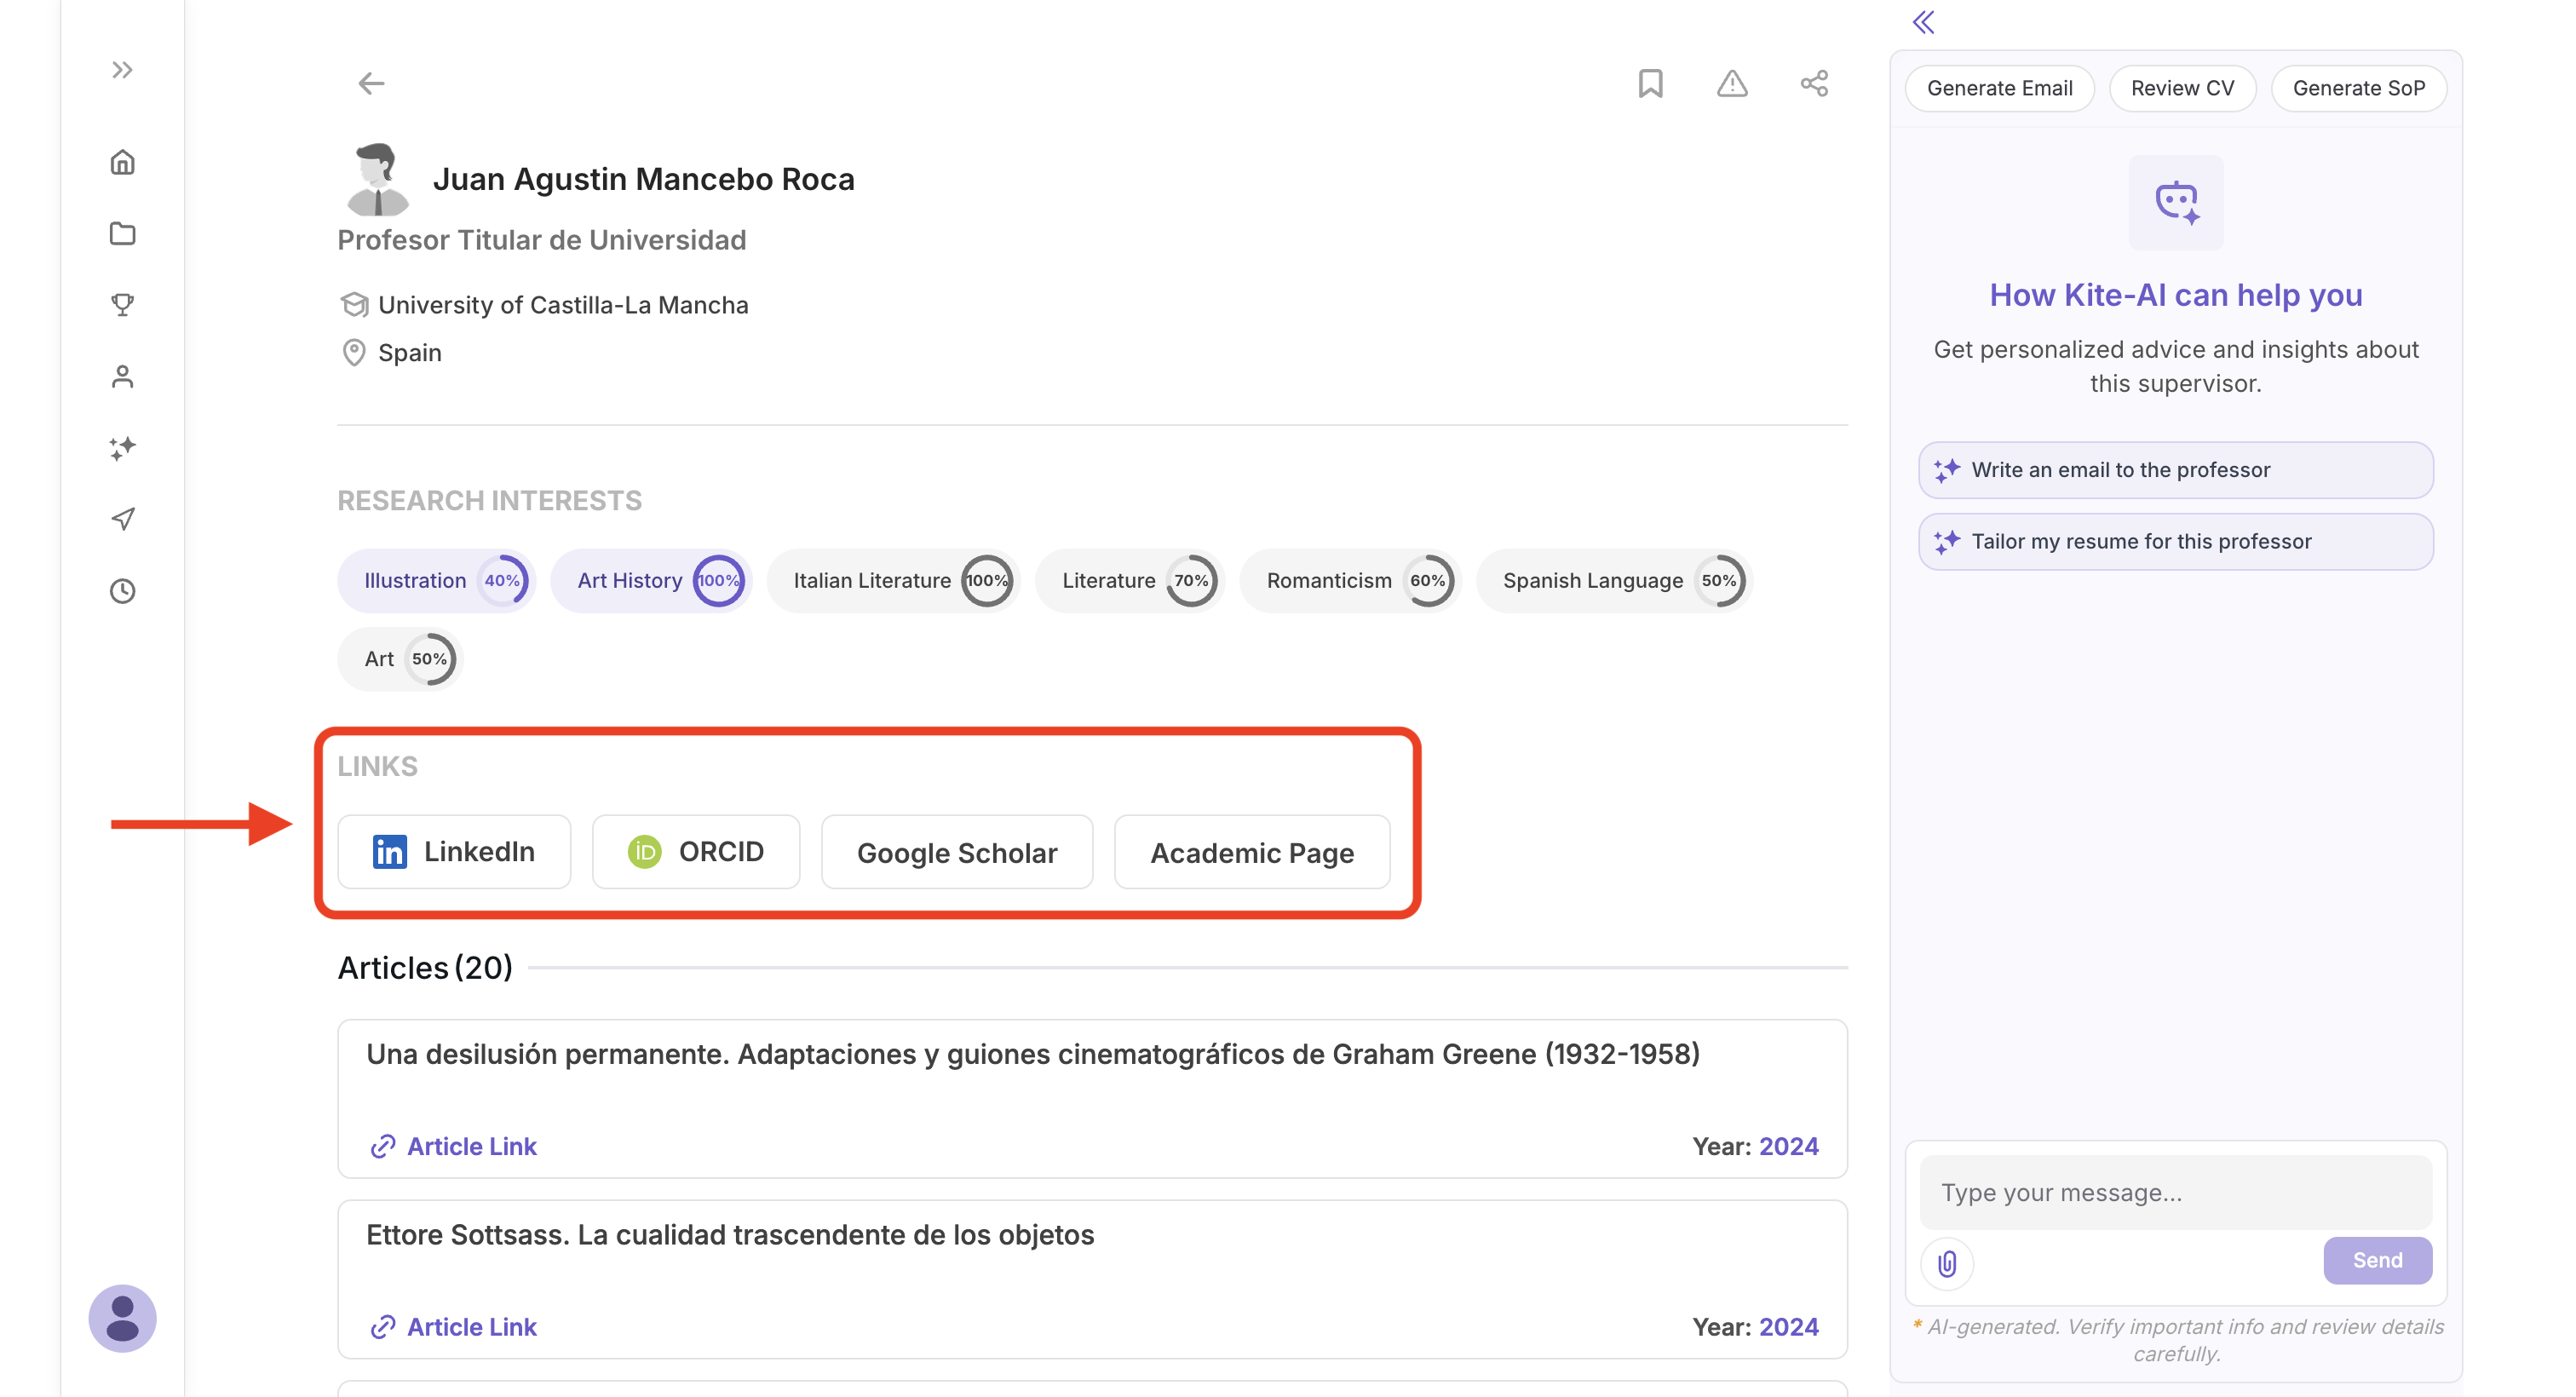
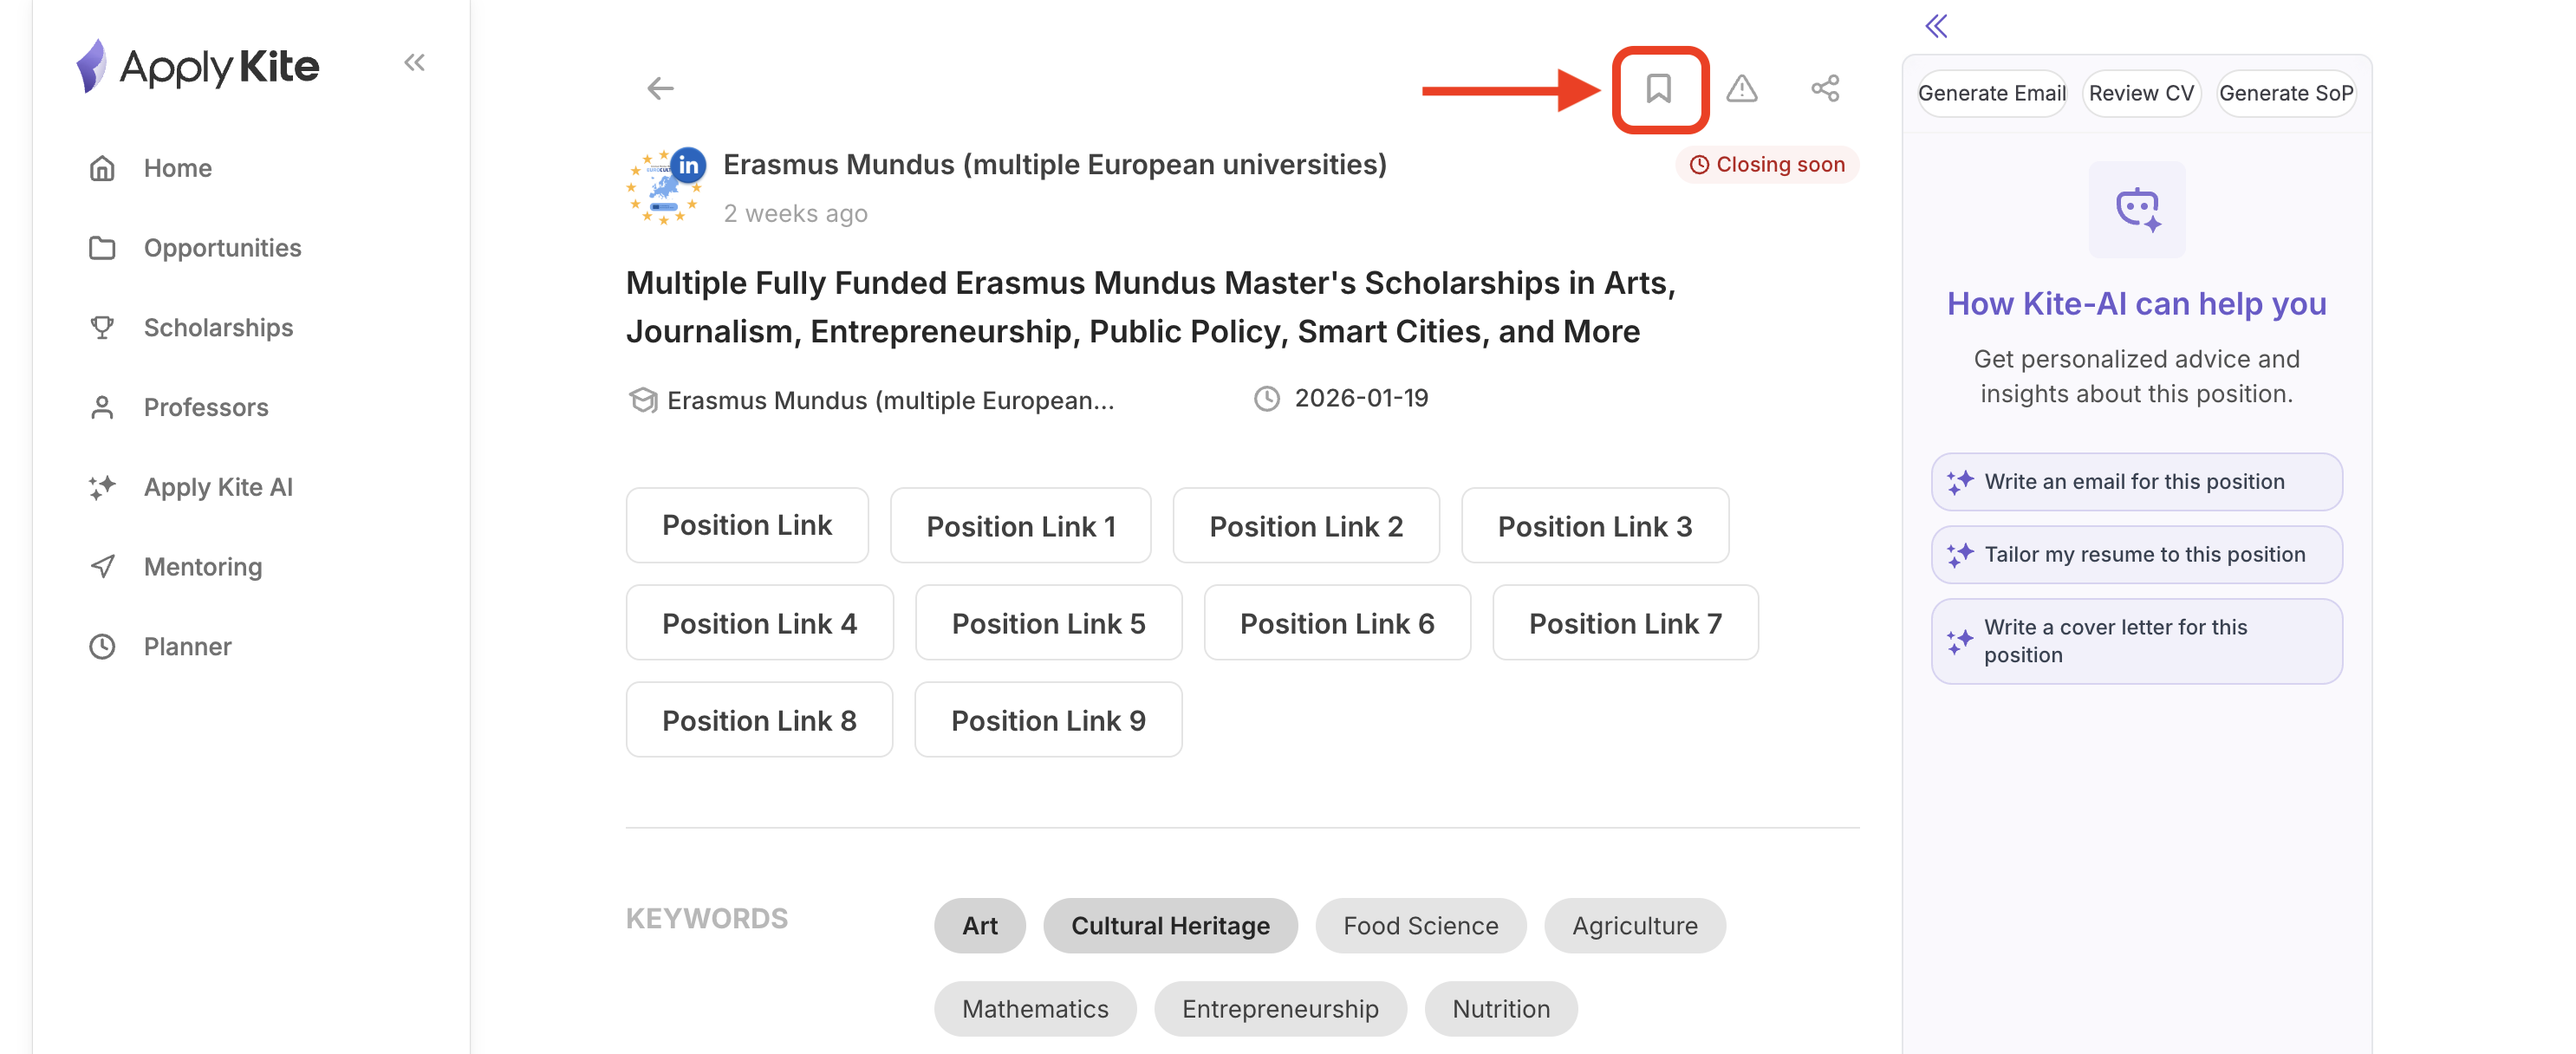
After you find professors using filters, you can open a professor profile to see full details.
On each professor page, you can review information such as their background, publications, LinkedIn, and more.
- At the bottom of the page, you can check positions related to that professor.
- From this section, you can do the following actions:
- Report the professor if the link or information is incorrect.
- Add a note and share your opinion (note: these notes are visible to all users).
- Add the professor to your favorites, so you can track them later in Planner/Activity (explained below).
On the right side of the page, you’ll also see the ApplyKite chatbot.
If you’ve already added your CV, field, study level, etc., you can generate an email or SOP for this professor with a single click.
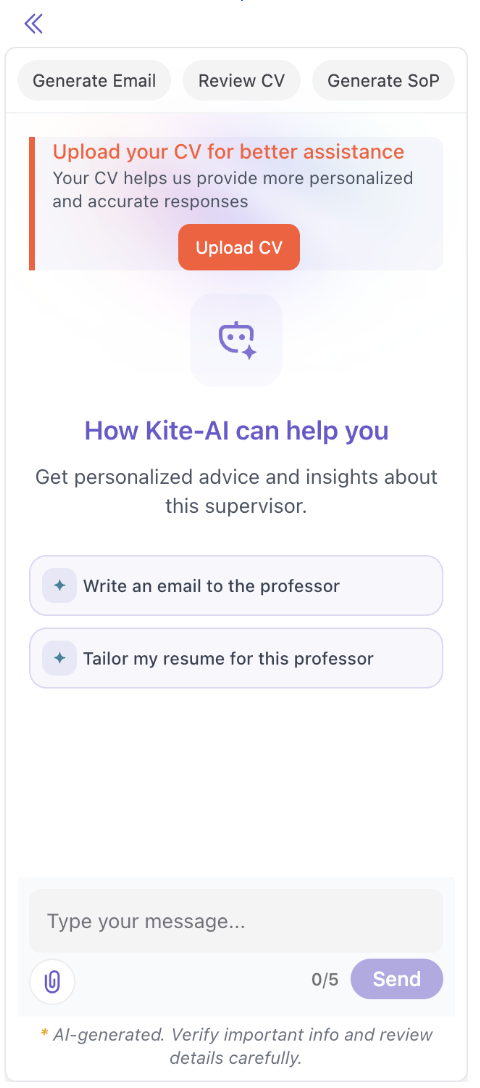
- Another feature is reviewing your CV based on the professor’s profile and details.
- The key benefit: you don’t need to manually enter information. ApplyKite AI updates your email, SOP, and CV based on that professor and gives you a personalized version—this can significantly improve your chances.
- Also, you don’t need to spend time copy-pasting information—ApplyKite does it automatically.
- In the free version, you have limits on Kite AI usage. By upgrading to Pro, you can use these features without limits.
Using Professor History (Tracking & Planner)
Many applicants track professors or outreach using Google Sheets or Excel.
The good news: you don’t need to manually update spreadsheets anymore. Just go to Planner from your dashboard.
Here, you can review professors you checked and update your status.
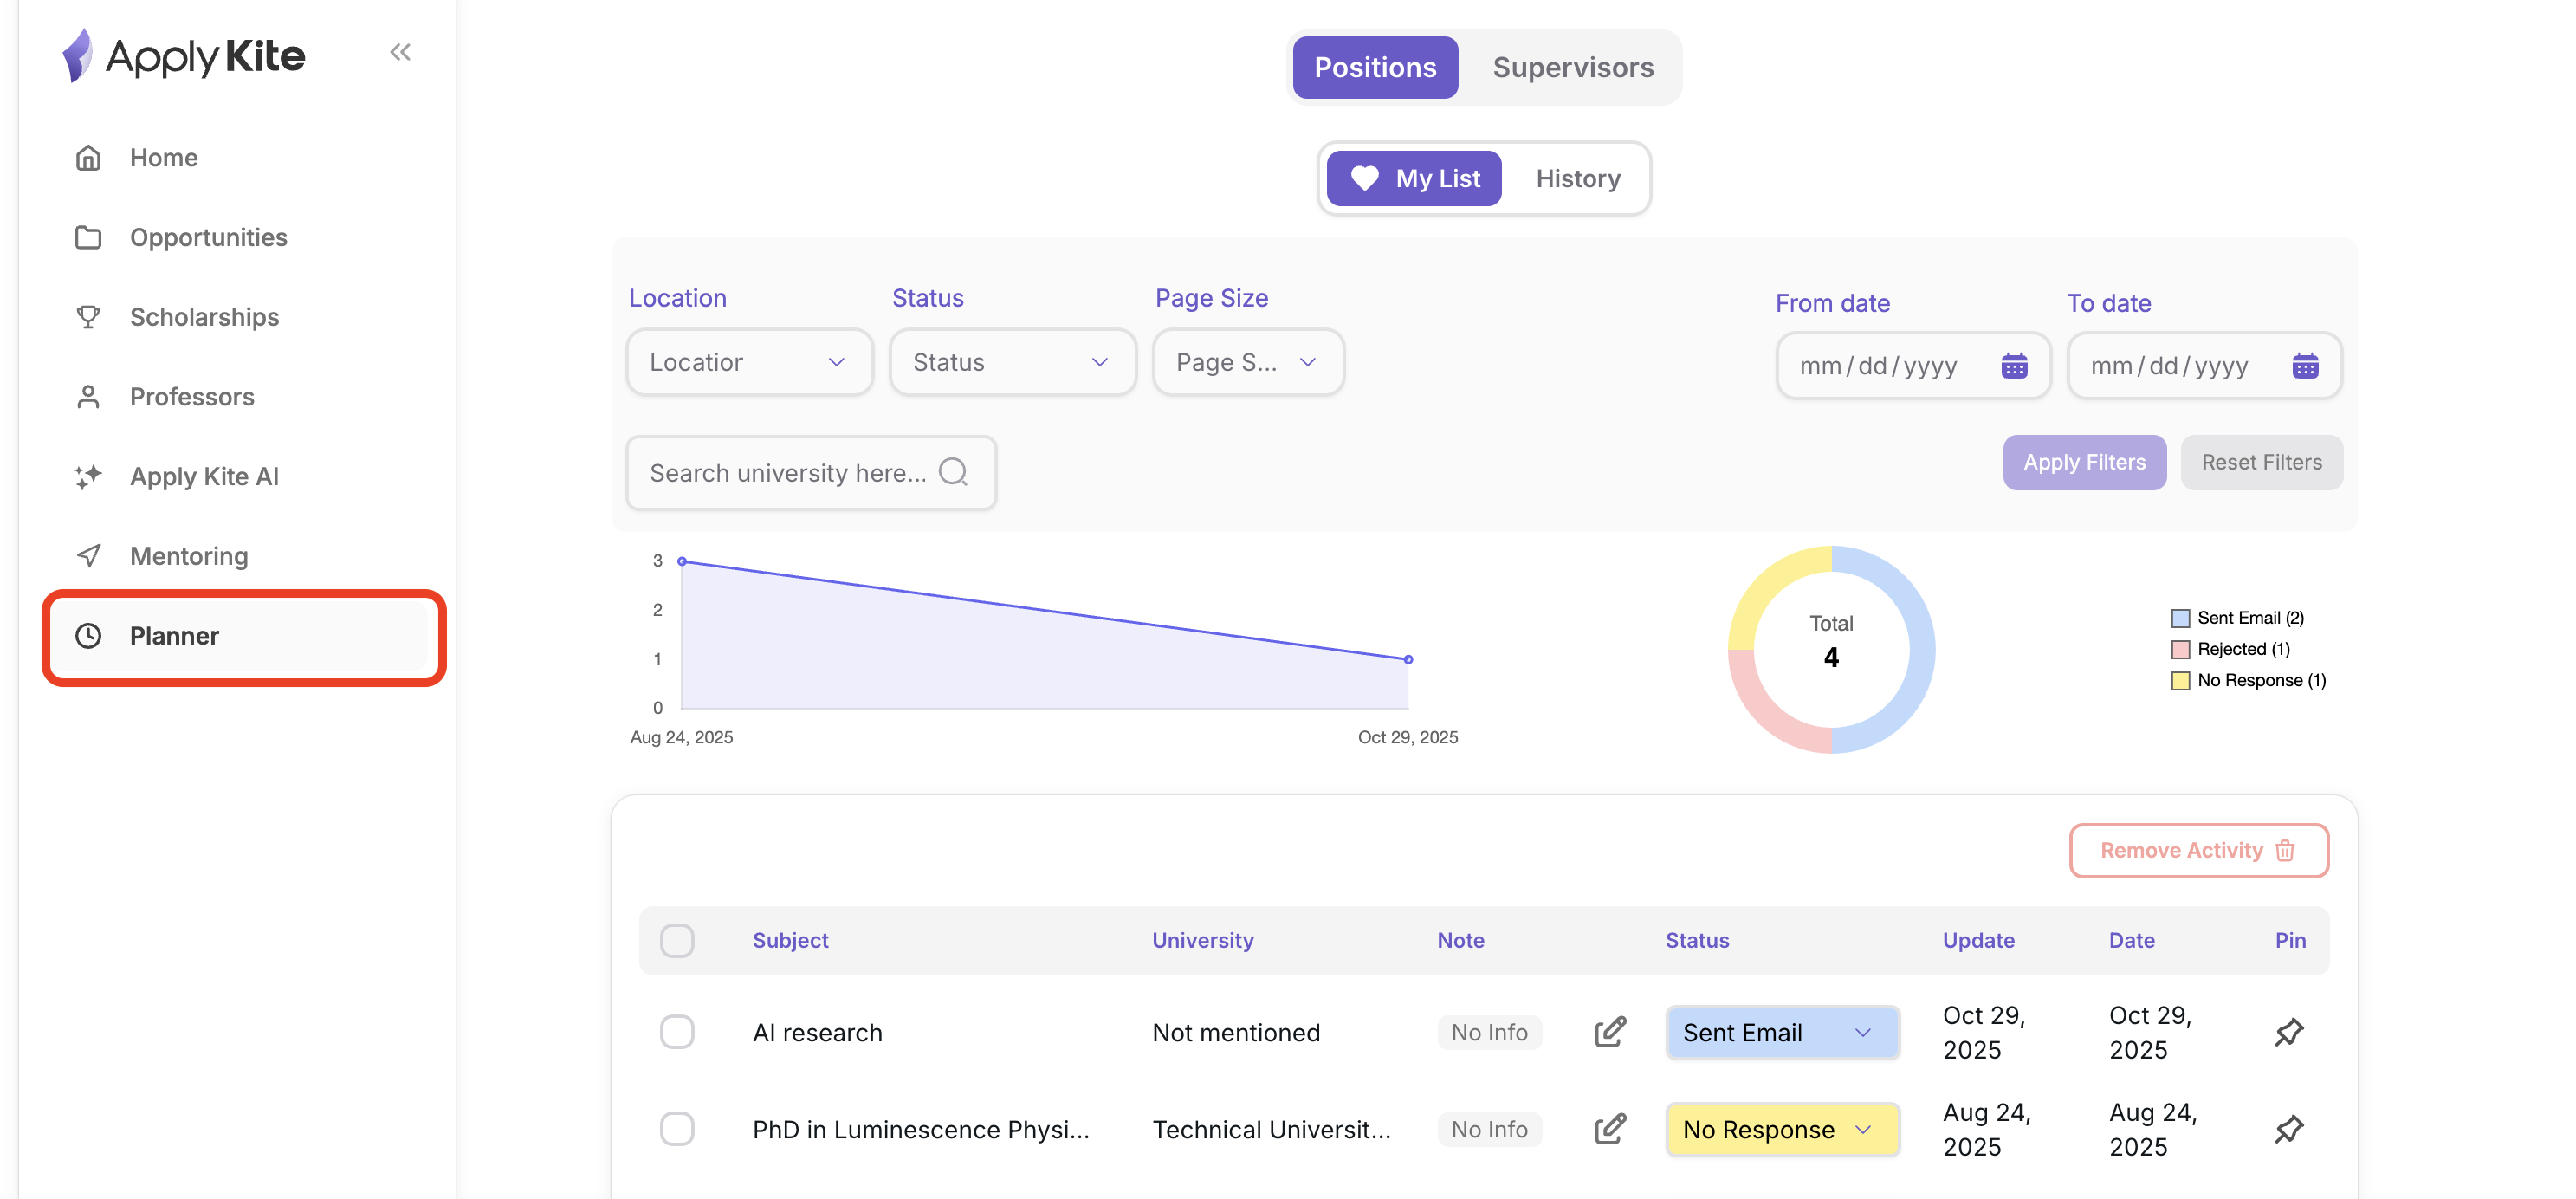
In this section, you can see each professor, date, status, and more.
To add a professor here, click the heart icon on the professor page.
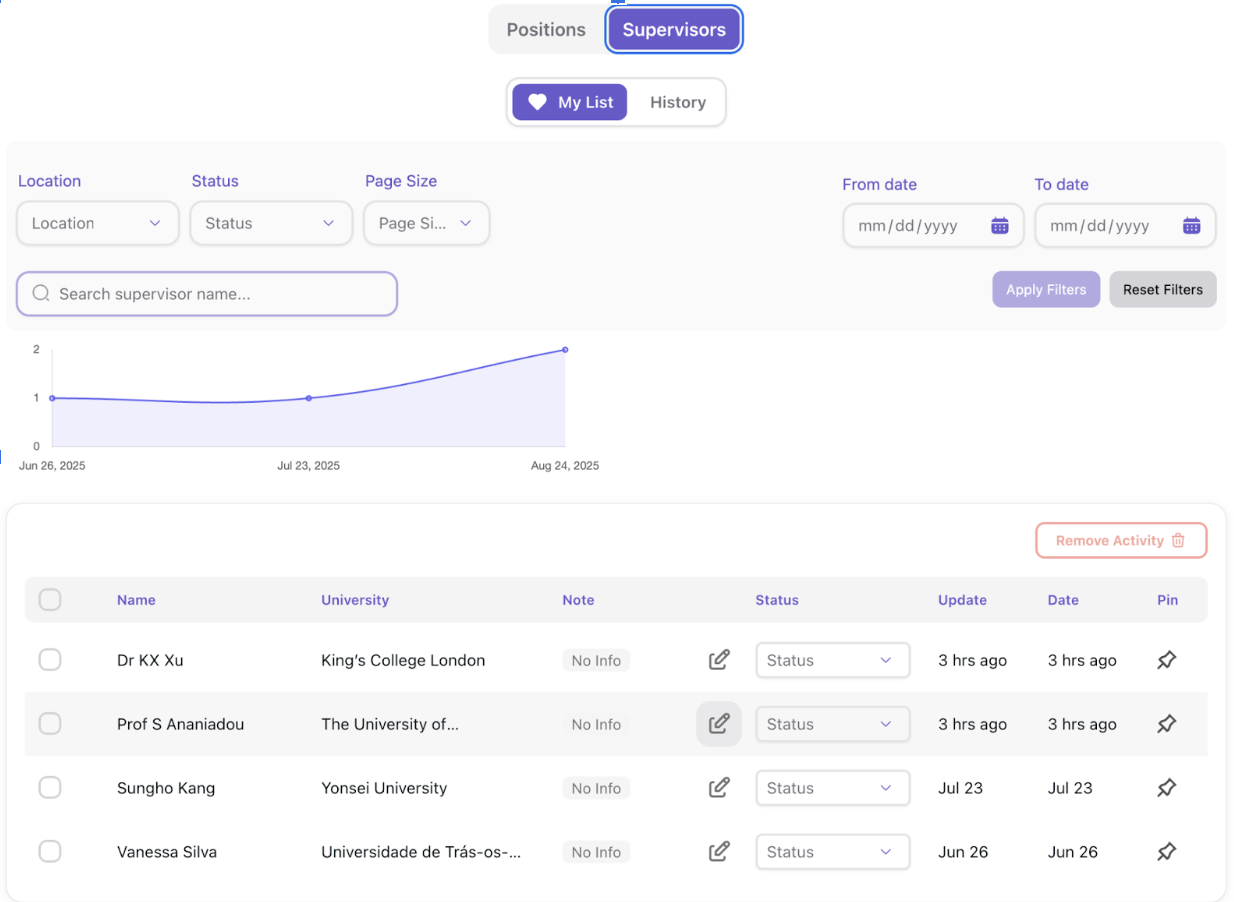
- You can view and filter professors by date, status, country, etc.

- You can update each professor’s status based on your progress:
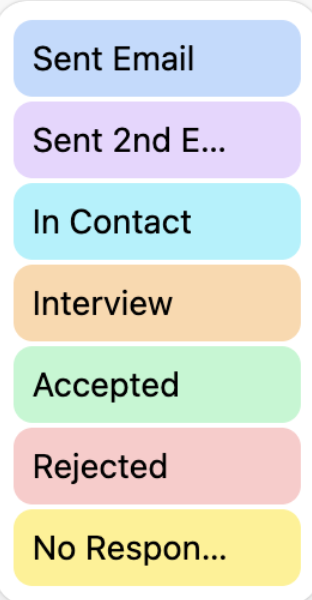
- For example, you add a professor to your favorites.
- Then in your activity/planner, you can change the status to Sent Email after you contact them.

- You can also review your progress as charts.

FAQ
I search but I can’t find relevant professors!
- Most likely you’re using keywords that are too general. Try adding a more precise list of keywords related to your field. Also, make sure your profile field is not set to All.
Why can’t I see all results?
- ApplyKite provides part of the results for free so you can explore the platform. To access all results and features, upgrade your account to Pro.
I search and nothing shows up!
- Your keyword list may be too limited.
- Your matching level may be too strict (only showing highly relevant results).
- Your selected filters may currently have no available results (for example, searching for a very specific combination like “Art + Canada” may return no results at this moment).
- Best solution: review and adjust your filters.
Where can I see the list of professors I already checked?
- Go to Planner → History.
How can I receive daily emails about professors in my field?
- Go to Settings from the menu and enable Alert.
Why can’t I see the Matching Level filter?
- If you clicked Don’t show again when the filter pop-up appeared, you won’t see it anymore. To enable it again, go to your Account Settings and update the preference there.